
This tutorial demonstrates the use of the onboard potentiometer available on the ARIES IoT Board. The potentiometer is a variable resistor that generates an adjustable analog voltage based on the position of its knob. This enables users to explore analog-to-digital conversion (ADC), user-controlled input, calibration techniques, and real-time control applications without requiring any external hardware connections.
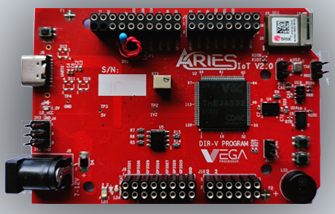
Aries IoT v2.0 Board
The ARIES IoT is a fully indigenous and a “Made in India” product to get started with basic microprocessor programming and embedded systems. This board is built upon a RISC-V ISA compliant VEGA Processor with easy-to-use hardware and software. For more details about ARIES IoT boards please refer to the ARIES development boards and Ecosystem.
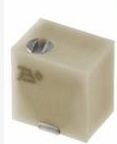
Potentiometer
The potentiometer is a variable resistor that allows users to generate adjustable analog voltage levels. By rotating the potentiometer knob, the output voltage changes, which can be read by the board’s ADC (Analog-to-Digital Converter). It is commonly used for learning analog input concepts, controlling parameters such as LED brightness, setting threshold values, and testing sensor-based applications without requiring external components.
Prerequisites
- Windows 10 or above/Ubuntu 20.04 LTS or above
- Arduino IDE
- VEGA ARIES Board support package
Components Required
- ARIES IoT v2.0 Board
- USB type C cable
Circuit Diagram
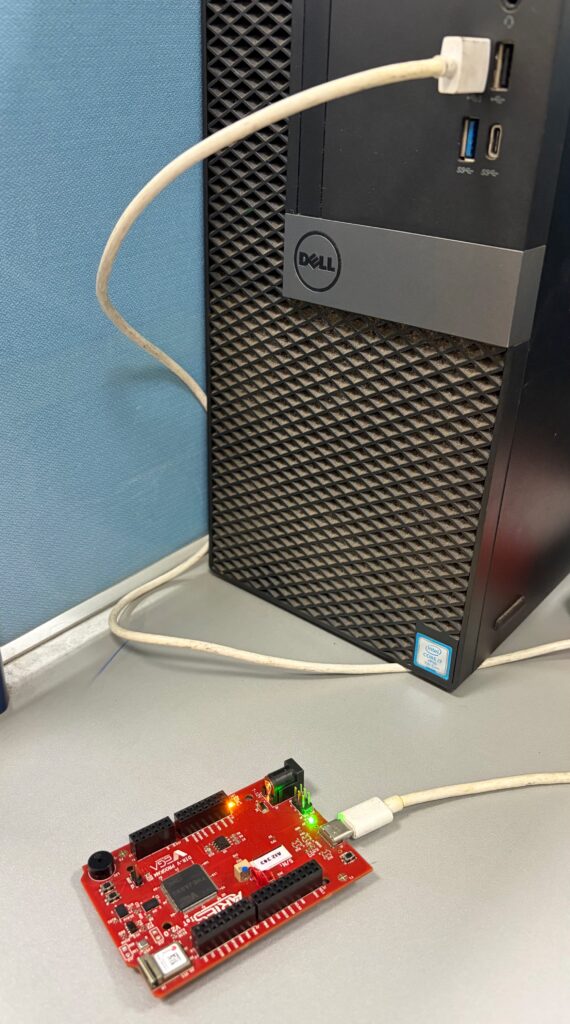
No external connections required to test this code. You can directly connect Aries IoT board through USB and upload the program.
Procedure
Setup VEGA Ecosystem
Download and install Arduino IDE 2.3.10
Once installed Open Arduino IDE
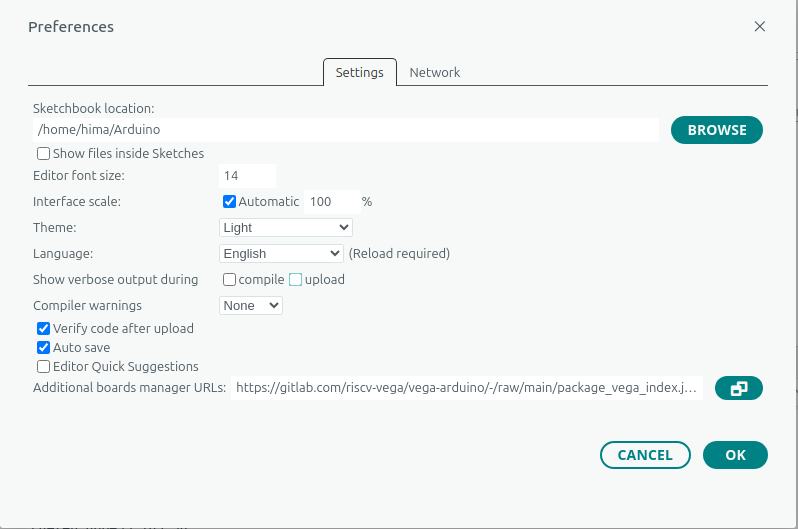
Open File->Preferences, Add below JSON in “Additional Boards Manager URL”, Press OK
https://gitlab.com/riscv-vega/vega-arduino/-/raw/main/package_vega_index.json
Open Tools->Boards->Board manager, Search for “vega”
Install “VEGA ARIES Boards” with latest version
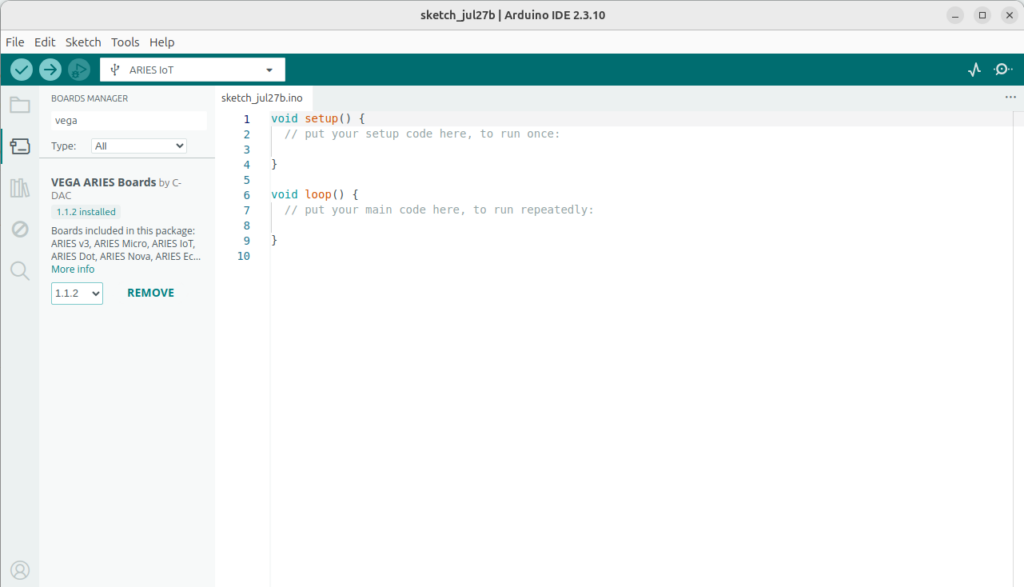
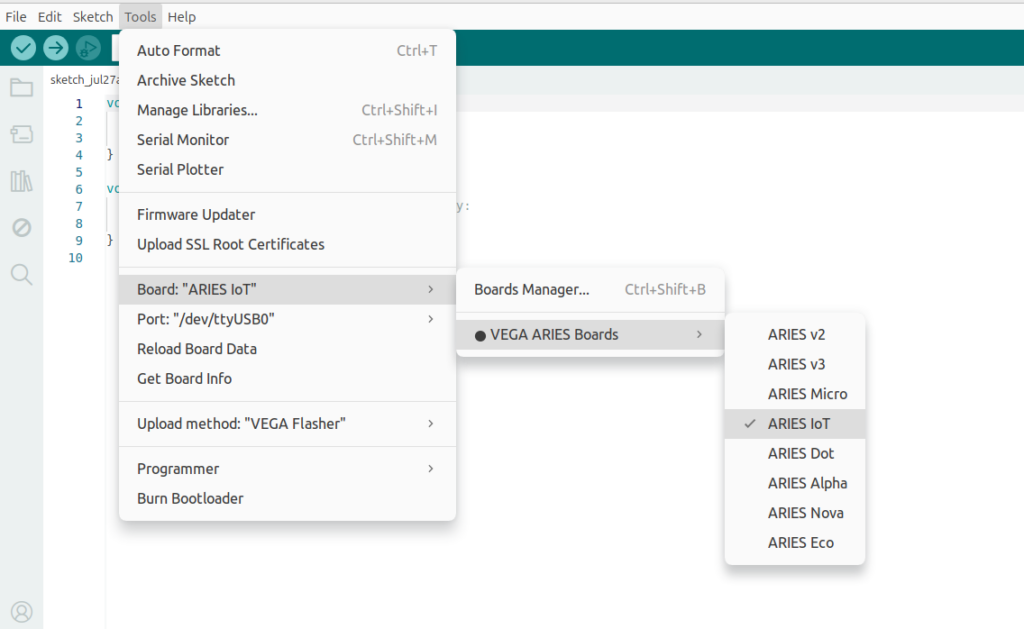
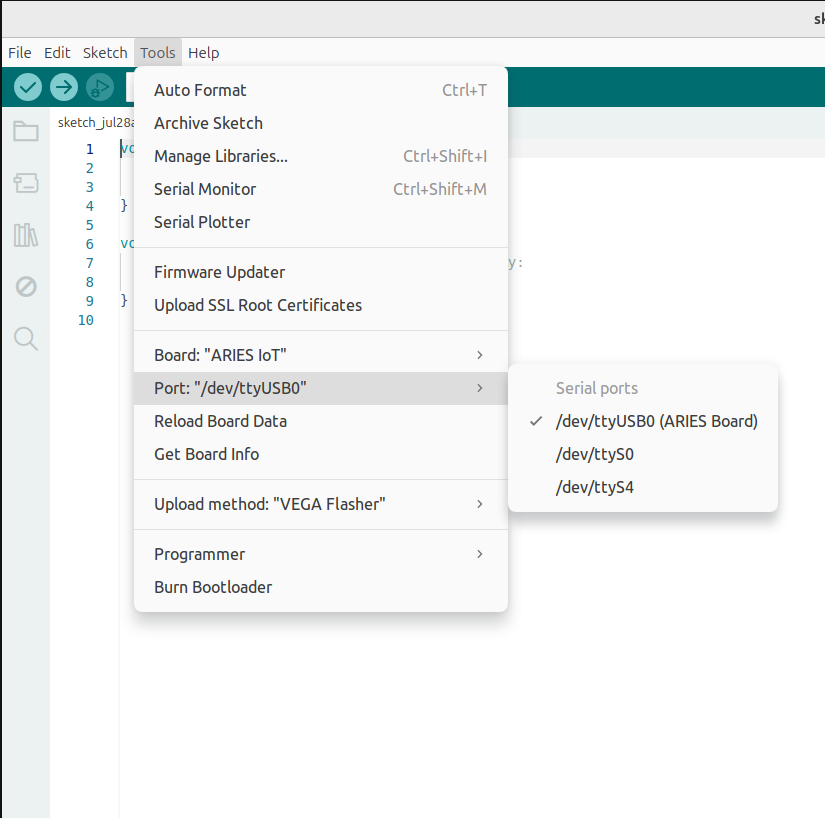
Select ARIES IoT Board from Tools -> Board -> VEGA Processor: ARIES Boards -> ARIES IoT
Check your ARIES board whether the BOOT SEL pin is shorted using a jumper or not.
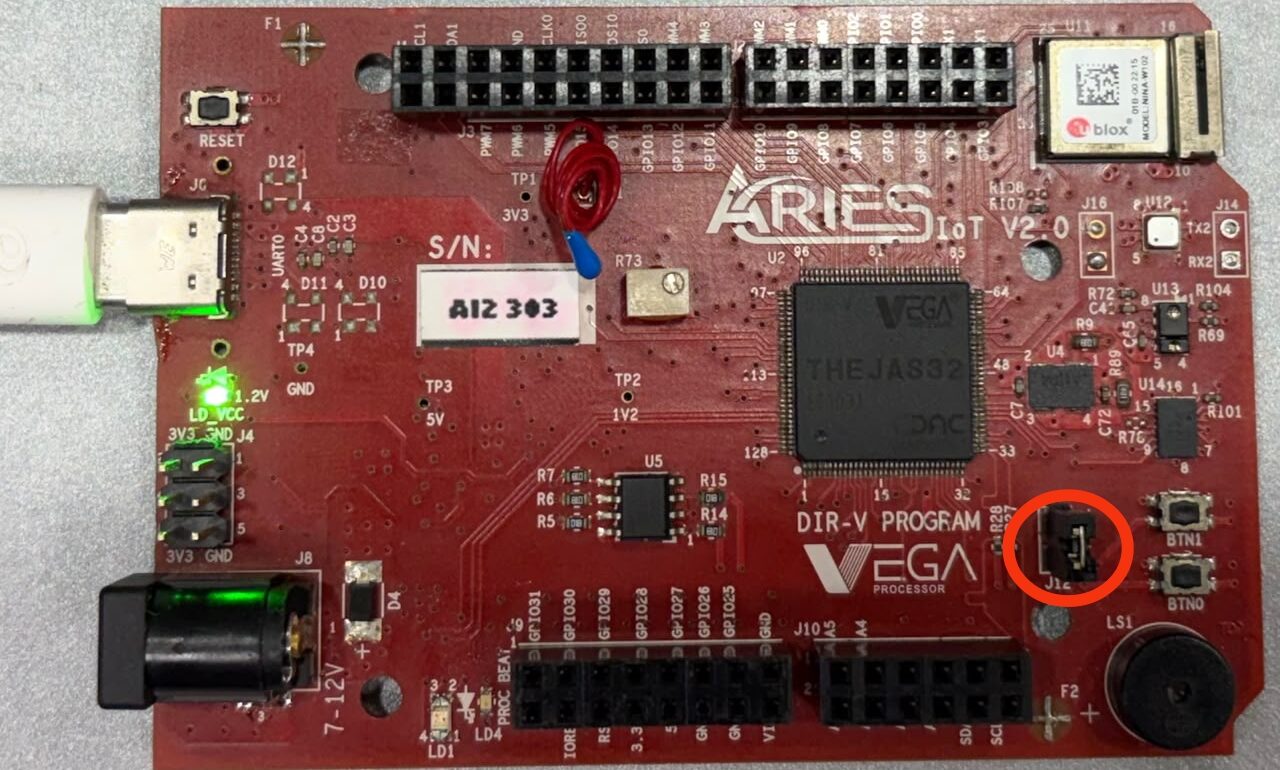
If
BOOT-SEL jumper (J12) is shorted :
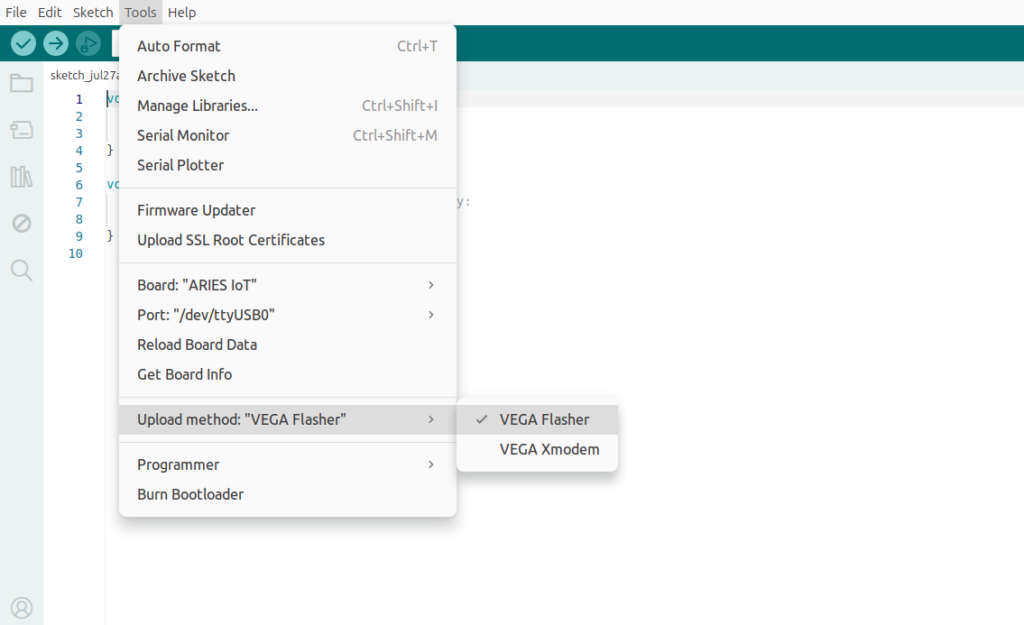
Select Tools -> Upload method -> VEGA FLASHER
Else
Select Tools -> Upload method -> VEGA XMODEM
Here the BOOT SEL pin is shorted, so we have selected VEGA FLASHER from Upload method
Also select appropriate port from Tools -> Port -> COM* (ARIES Board) for windows and dev/tty/USB*(Aries Board) for ubuntu
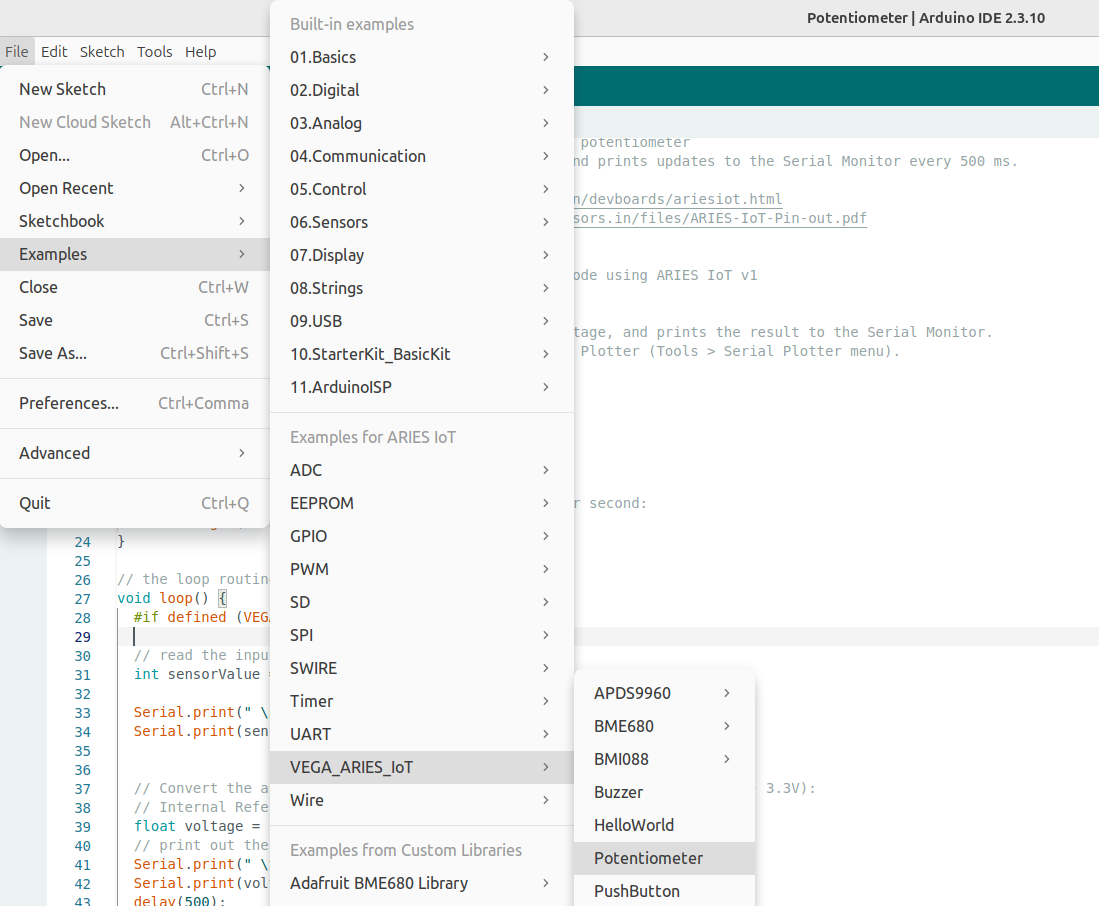
Now, Open Files -> Examples -Under Examples for ARIES IoT -> VEGA_ARIES_IoT -> Potentiometer
Finally Upload the code to ARIES IoT board
Output
After uploading the program to the VEGA ARIES IoT Board and opening the Serial Monitor at 115200 baud, the board continuously reads the analog voltage generated by the onboard potentiometer. As the potentiometer knob is turned, the analog input value changes, producing ADC readings ranging from 0 to 4095. When the potentiometer shaft is turned fully in one direction, 0 V is applied to the input pin and the ADC reads 0. When the shaft is turned fully in the opposite direction, 3.3 V is applied to the input pin and the ADC reads 4095.
