In this tutorial, we will see how we can interface AT24C256 EEPROM module to Aries v2.0 Board. EEPROM stands for Electrically Erasable Programmable Read-only Memory.
EEPROM
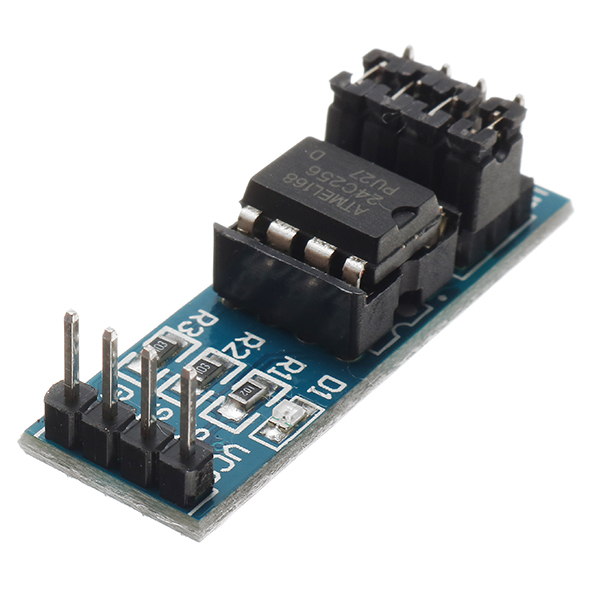
It is a type of non-voltaile memory used in computers, integrated in microcontrollers for Smart cards and remote keyless systems, and other electronic devices to store relatively small amounts of data by allowing individual bytes to be erased and reprogrammed. EEPROMs can be programmed and erased in-circuit, by applying special programming signals. The AT24C256 EEPROM is organized as 32,768 words of 8 bits each. The device is optimized for use in many industrial and commercial applications where low power and low voltage operation are essential.
Circuit Diagram:

Connections:
| EEPROM Module | ARIES V2 board |
| VCC | +3.3V |
| SCL | SCL1 |
| SDA | SDA1 |
| GND | GND |
Now, for powering up the ARIES v2 board via USB port of a Laptop/Desktop/PC and burning the code into the ARIES v2 board, we have to use a micro USB type B to USB type A cable. The cable should be connected to UART0 port of the ARIES v2 board, and the Laptop/Desktop/PC should be preinstalled with VEGA SDK and Toolchain.
Procedure:
After setting up the toolchain and SDK path environments, clean the executable using make clean command.
cd examples/i2c/at24c256_i2c_eeprom/make cleanBuild the example program for at24c256 eeprom sensor by using make command
make Before transferring the built program to board, ensure that you have connected the UART0 connector of the board to the PC.
Open a new terminal, execute the following command
sudo minicom ariesNow you can see the minicom terminal opened and the board UART terminal is ready.

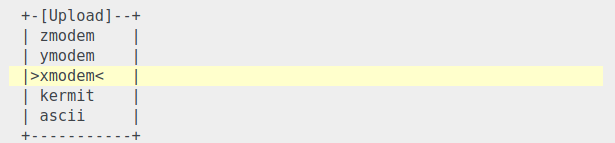
Press CTRL+A and then press S to enter file sending menu and select xmodem by pressing Enter.
In the next window, with Space bar select the at24c256_i2c_eeprom.bin file to be transferred. By pressing Enter, transfer process starts.
Wait until the process is completed. The screen should display how much data has been transferred.
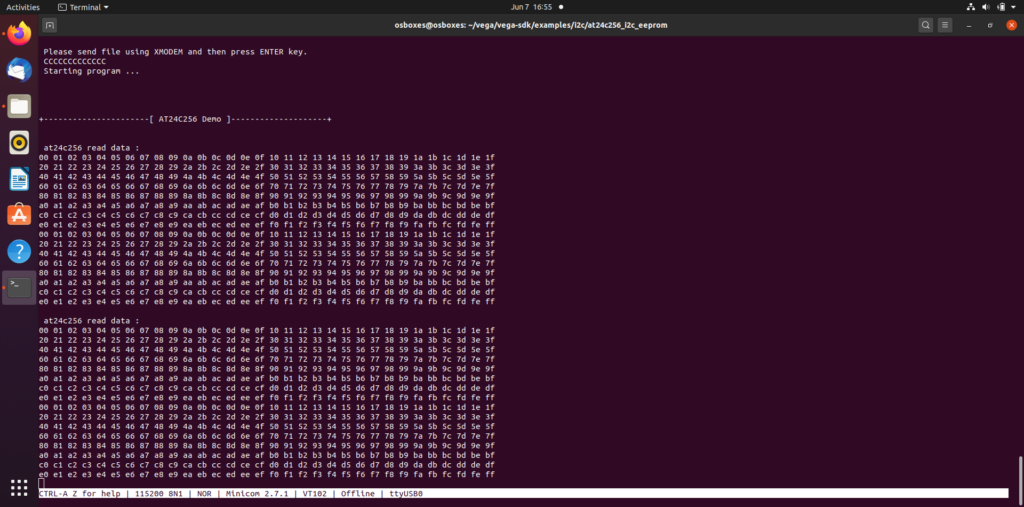
After completing transfer the program will start to execute. The example program writes 0x0 to 0xFF to the first 256 locations of the EEPROM and reads back the same location. The read data is displayed on minicom.
Output: