In this tutorial, we will see how we can interface the 4×3 Matrix Keypad Module to the Aries v2.0 Board.
Matrix Keypad
Most of the applications of embedded systems require keypads to take the user inputs, especially in the case where an application requires more keys , with simple architecture and an easy interfacing procedure, matrix keypads are replacing normal push buttons by offering more inputs to the user with the lesser I/O pins.
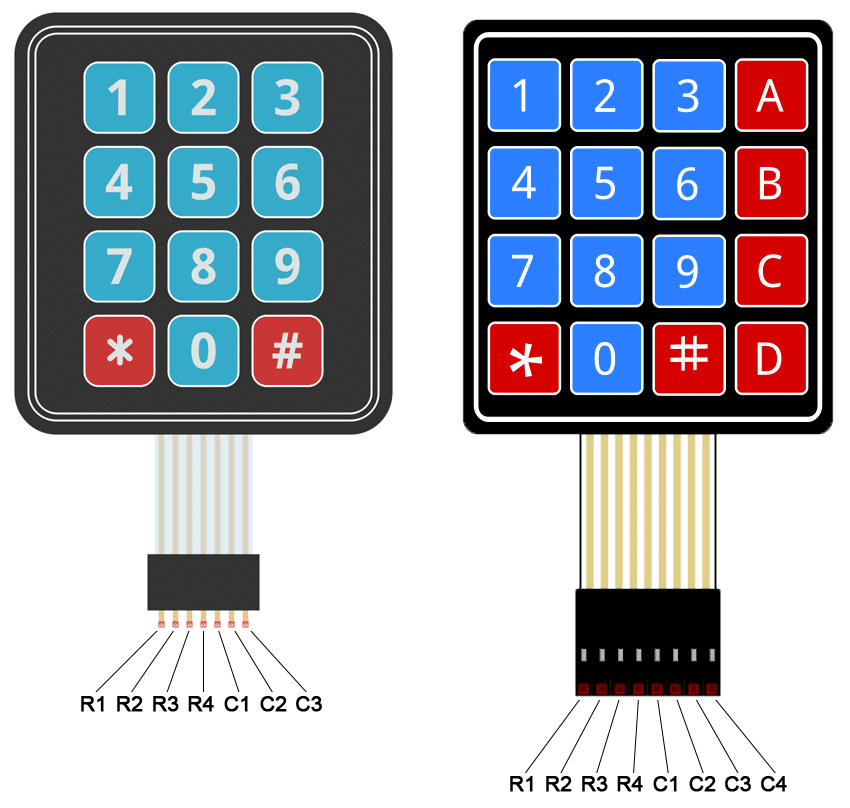
A matrix keypad consists of a set of push buttons or switches which are arranged in a matrix format of rows and columns. These keypads are available in configurations like 3×4 and 4×4 based on the application it is implemented for.
A 4×3 Matrix Keypad contains 12 buttons having 4 rows and 3 columns. It is most commonly used input device in many application areas like digital circuits, telephone communications, calculators, ATMs, and so on.
Matrix Keypad
Circuit Diagram:
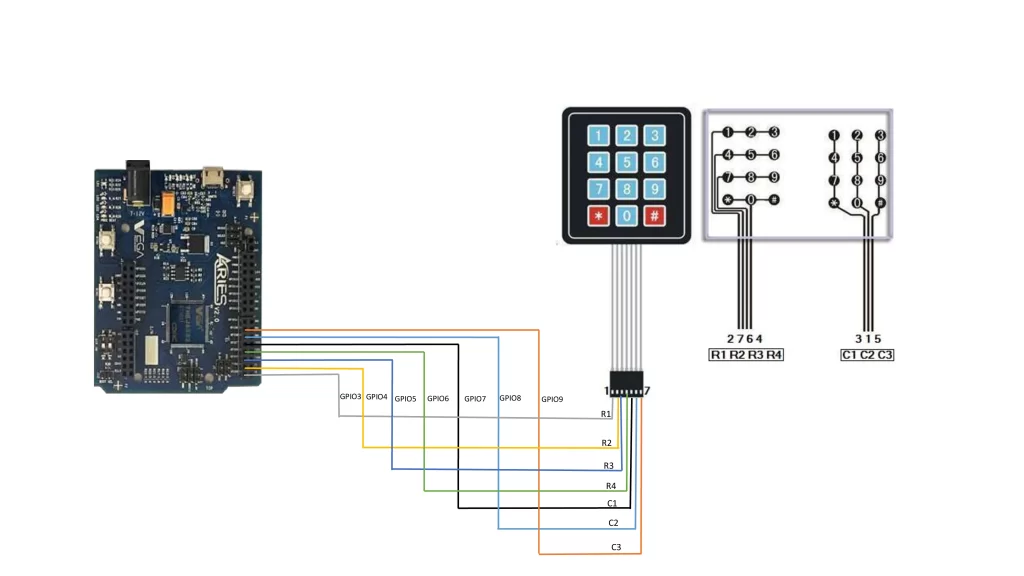
Connections:
| 4×3 Matrix Display | Aries v2 Board |
| R1 | GPIO3 |
| R2 | GPIO4 |
| R3 | GPIO5 |
| R4 | GPIO6 |
| C1 | GPIO7 |
| C2 | GPIO8 |
| C3 | GPIO9 |
Now, for powering up the ARIES v2 board via USB port of a Laptop/Desktop/PC and burning the code into the ARIES v2 board, we have to use a micro USB type B to USB type A cable. The cable should be connected to UART0 port of the ARIES v2 board, and the Laptop/Desktop/PC should be preinstalled with VEGA SDK and Toolchain.
Procedure:
After setting up the toolchain and SDK path environments, build the example program for the TM1637 module by:
cd examples/gpio/4×3_keypad_demo/
Commands which are given to the terminal as follows:
To clean the executable: make clean
To build the project: make
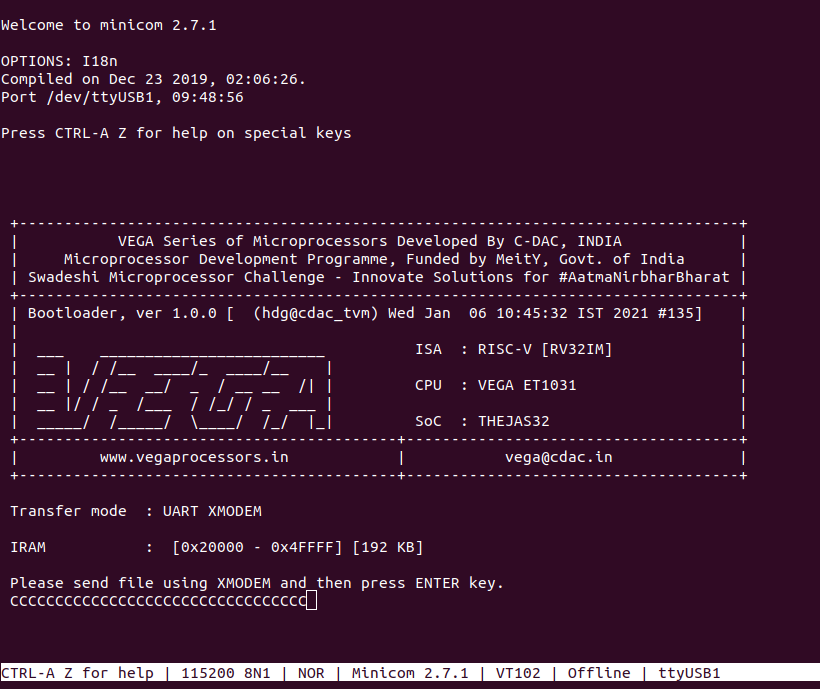
Now, we can transfer the built program to the board, before transfer please ensure that you have connected the board UART0 connector to the PC. Open a new terminal and execute the following command:
sudo minicom aries
Now we can see the minicom terminal opened and the board UART terminal is ready. Press Reset Button to set the Aries Board.:
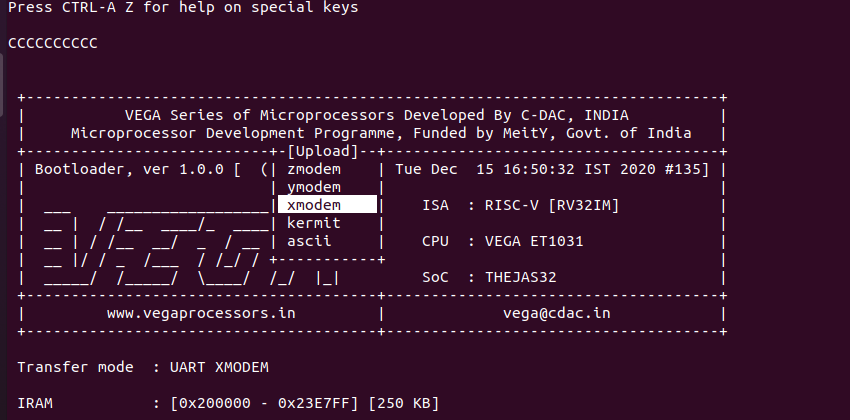
Press CTRL+A and then press S to enter file sending menu and select xmodem by pressing Enter as follows:
In the next window, with the space bar, select the 4x3_keypad_demo.bin file to be transferred. By pressing Enter, the transfer process starts.
Wait until the process is completed. The screen should display how much data has been transferred.
After completing transfer the program will start to execute.
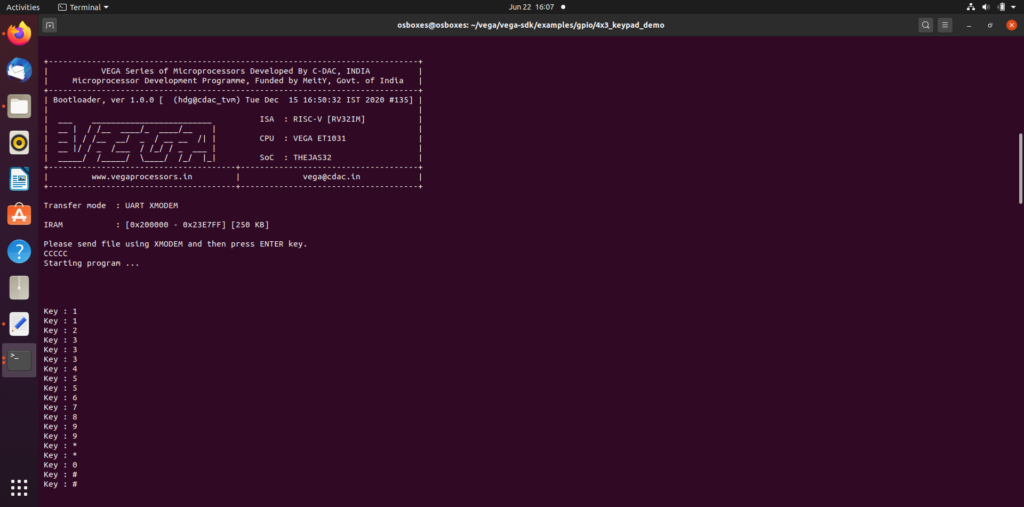
Output:
We get the output as per input given by user or as per the key pressed by the user i.e. either 1,2,3,4,5,6,7,8,9,*,0 or #.