In this tutorial, we will see how we can interface W25Q32 flash with ARIES V2 board using SPI protocol. SPI Flash memories provide a storage solution for systems with limited space, pins and power.
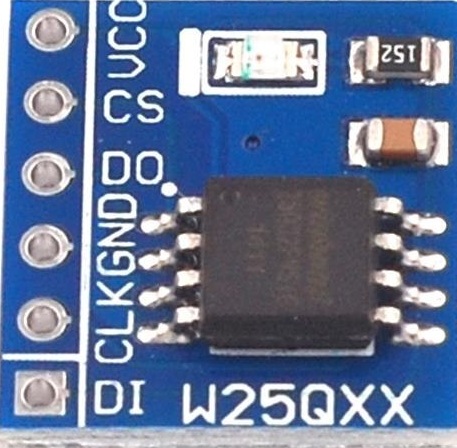
W25Q32 SPI flash
W25Q32 Flash is 32M Bit Flash memory which operate on a single 2.7V to 3.6V power supply with current consumption as low as 5mA active and 1μA for power-down. The flash is organized into 16,384 programmable pages of 256-bytes each. Up to 256 bytes can be programmed at a time using the Page Program instructions. Pages can be erased in groups of 16 (sector erase), groups of 128 (32KB block erase), groups of 256 (64KB block erase) or the entire chip (chip erase). The W25Q32 has 1024 erasable sectors and 64 erasable blocks. The small 4KB sectors allow for greater flexibility in applications that require data and parameter storage.
Circuit Diagram
The W25Q32 has six pins: Vcc, DO,DI,CS,CLK and GND. (Refer W25Q32 datasheet).
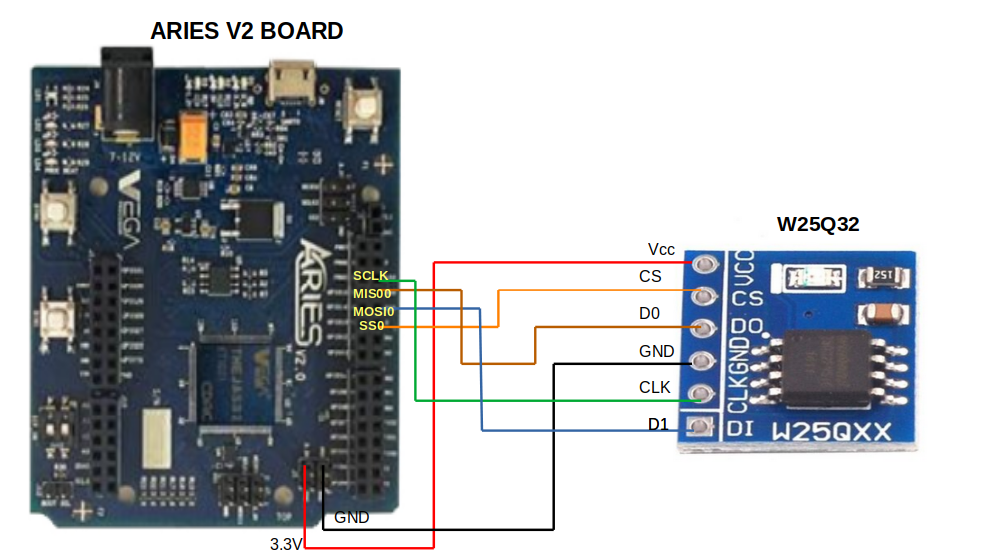
| W25Q32 SPI Flash | THEJAS SOC |
| Vcc | 3.3V |
| CS | SS0 |
| DO | MISO0 |
| GND | GND |
| CLK | SCLK0 |
| DI | MOSI0 |
Make connections as listed in the above table. Use the diagram given below as reference. Now, for powering up the ARIES v2 board via USB port of a Laptop/Desktop/PC and burning the code into the ARIES v2 board, we have to use a micro USB type B to USB type A cable. The cable should be connected to UART0 port of the ARIES v2 board, and the Laptop/Desktop/PC should be pre-installed with VEGA SDK and Toolchain.
Procedure
After setting up the toolchain and SDK path environments, clean the executable using make clean command.
cd vega-sdk/examples/spi/w25q32_spi_flashmake cleanBuild the example program for W25Q32 Flash by using make command
make Before transferring the built program to board, ensure that you have connected the UART0 connector of the board to the PC.
Open a new terminal, execute the following command
sudo minicom ariesNow you can see the minicom terminal opened and the board UART terminal is ready.
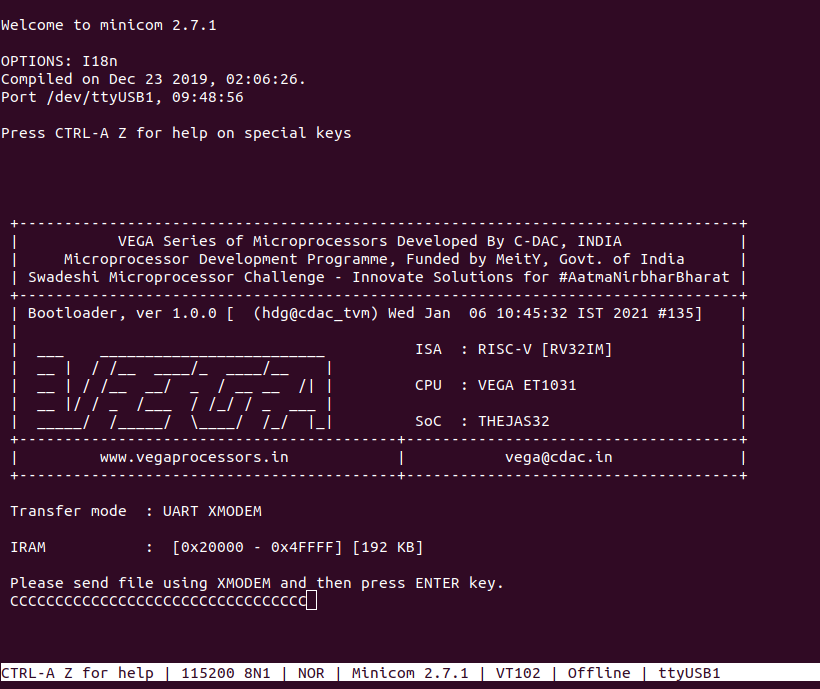
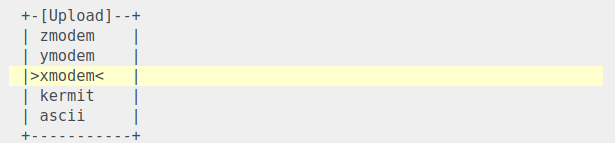
Use CTRL+A S to enter file sending menu and select xmodem by pressing Enter.
In the next window, with space bar select the w25q32_demo.bin file to be transferred, by pressing Enter, transfer process starts.
Wait until the process is completed. The screen should display how much data has been transferred.
After completing transfer the Program will start to execute.
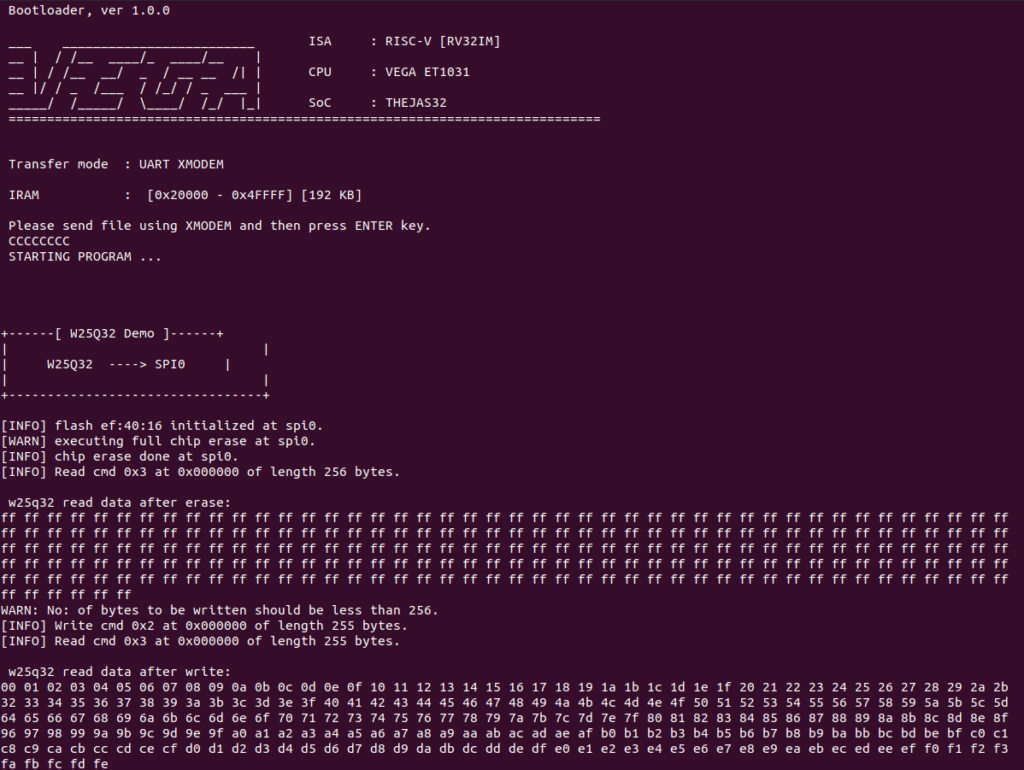
The example program erases the first 256 locations of the FLASH and reads the same location. After erasing, data 00 to 0xFF is written to the same 256 location and reads back the same location. The read data is displayed on minicom UART terminal.