In this tutorial, we will see how we can interface SSD1309 transparent monochrome OLED display with Aries MICRO v1.0 Board.
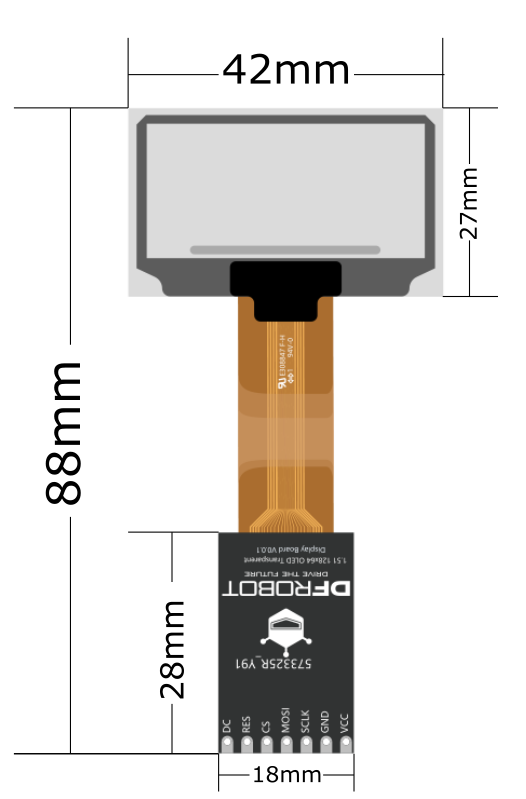
SSD1309 transparent monochrome Display
This is a 1.51” SSD1309 transparent monochrome OLED display(light blue) with a converter,full-view and blue display. For convenience, the small converter comes with two available connections: GDI and SPI.
Specification
- Screen Interface: 8-bit 68xx/80xx Parallel, 3-/4-wire SPI, I2C
- Adapter Interface: SPI, GDI
- Adapter Size: 18 x 28mm/0.71 x 1.10inch
- Working Voltage: 3.3V
- View Angle: full view
- Driver Chip: SSD1309
- Display Color: blue
- Display Area: 35.05 x 15.32 (mm)/1.40 x 0.60inch
- Pixel Pitch: 0.274 x 0.274mm
- Pixel Size: 0.254 x 0.254mm
- Screen Size: 41.92×27.08mm/1.65 x 1.07inch
- The fully transparent region resolution:128*56
- Working Temperature: -40~70 ℃
Circuit Diagram:
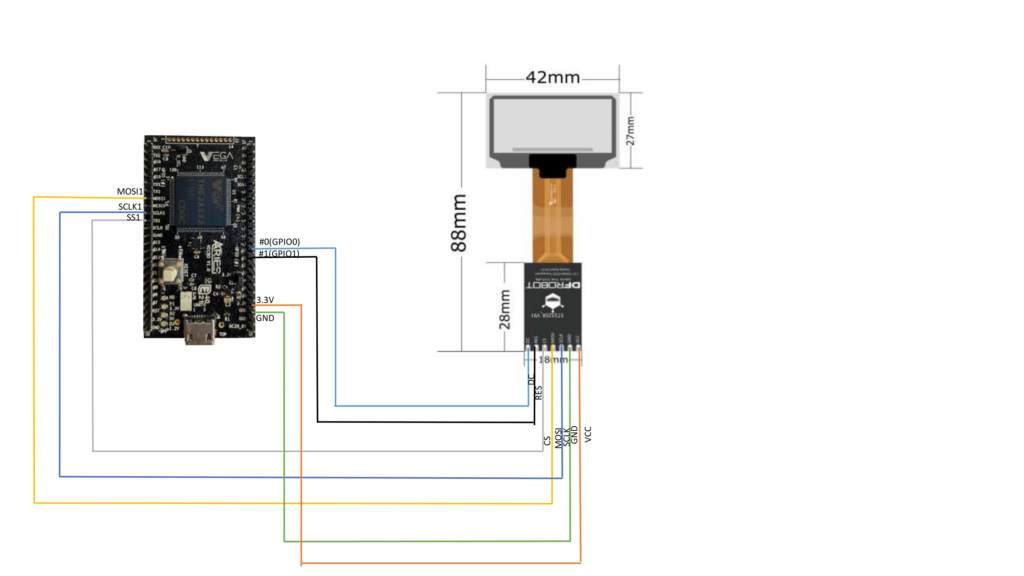
Connections:
| SSD1309 Display Module | ARIES V1.0 board |
| VCC | +3.3V |
| DC | #0(GPIO0) |
| RES | #1(GPIO1) |
| CS | SS1 |
| MOSI | MOSI1 |
| SCLK | SCLK1 |
| GND | GND |
Now, for powering up the Aries MICRO v1.0 board via the USB port of a Laptop/Desktop/PC and burning the code into the Aries MICRO v1.0 board, we have to use a micro USB type B to USB type A cable. The cable should be connected to the UART0 port of the Aries MICRO v1.0 board, and the Laptop/Desktop/PC should be preinstalled with VEGA SDK and Toolchain.
Procedure:
After setting up the toolchain and SDK path environments, clean the executable using the make clean command.
cd examples/spi/ssd1309_transparent_oled_demo/make cleanBuild the example program for the ssd1309 display sensor by using the make command
make Before transferring the built program to the board, ensure that you have connected the UART0 connector of the board to the PC.
Open a new terminal, execute the following command
sudo minicom ariesNow you can see the minicom terminal opened and the board UART terminal is ready.

Press CTRL+A and then press S to enter the file sending menu and select xmodem by pressing Enter.
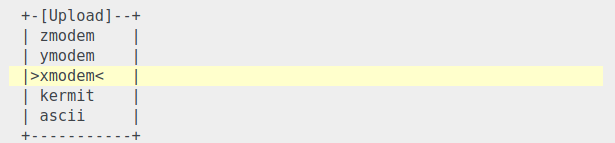
In the next window, select the ssd1309.bin file to be transferred with the Space bar. By pressing Enter, the transfer process starts.
Wait until the process is completed. After completing the transfer the program will start to execute.
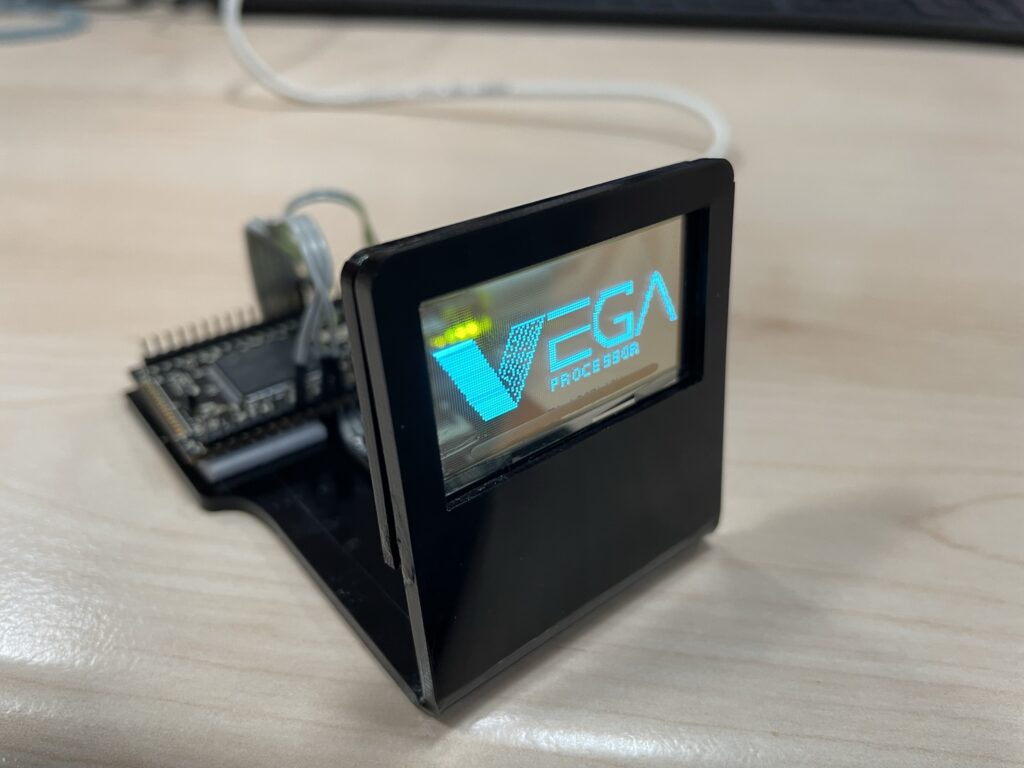
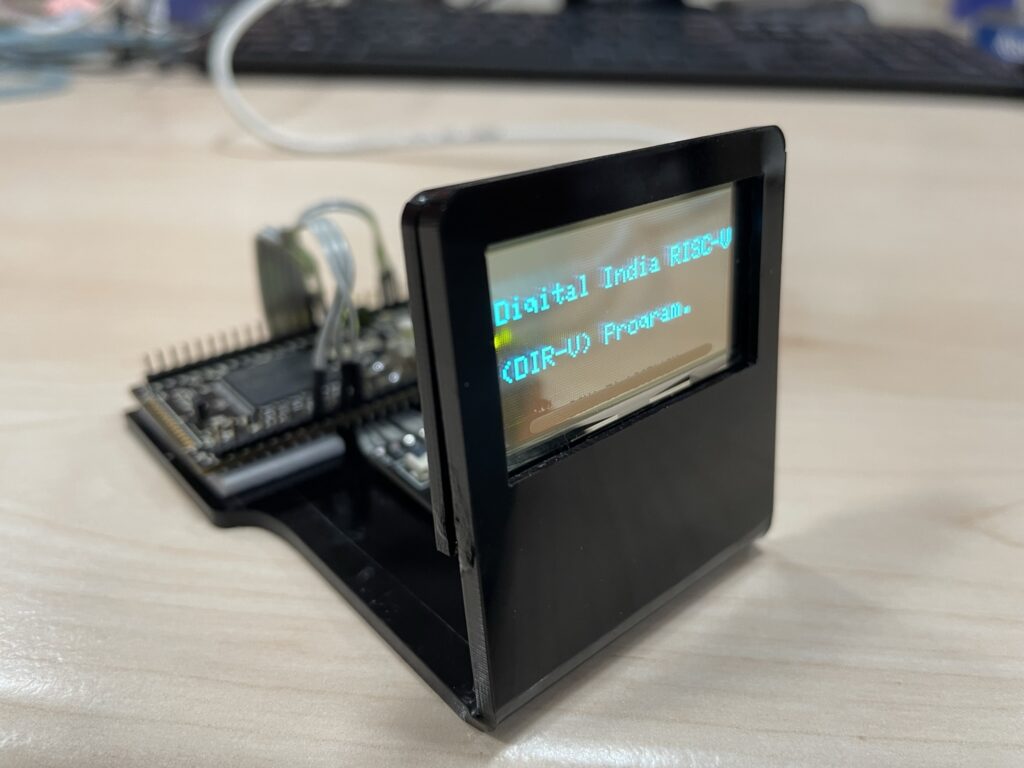
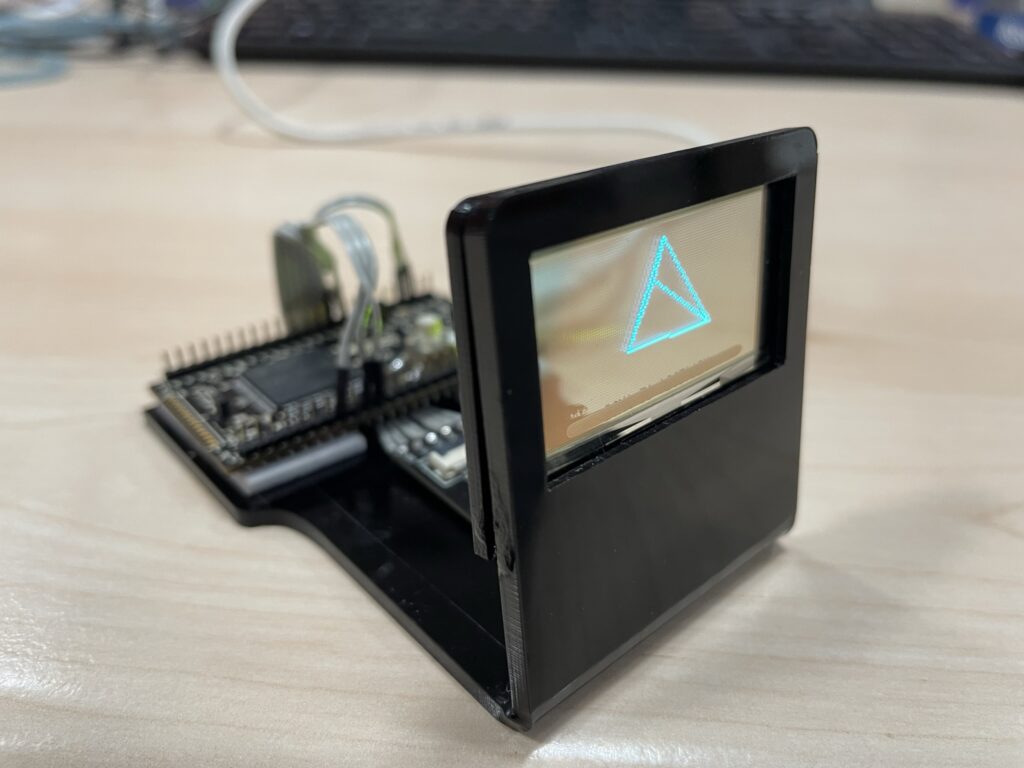
Output:
The OLED Screen shows different displays as follows: