In this tutorial, we will see how we can interface one channel relay module with ARIES V2 board. The Single Channel Relay Module is used to control high voltage, high current load such as motor, solenoid valves, lamps and AC load.
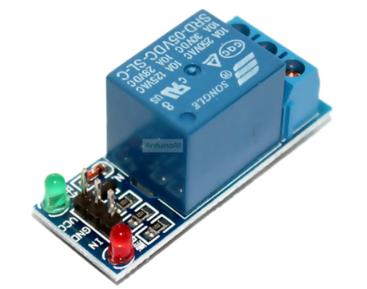
One Channel Relay Module
A relay is an electromagnetic switch operated by a relatively small current that can control much larger current. The single-channel relay module comprises of components that make switching and connection easier and act as indicators to show if the module is powered and if the relay is active or not. It uses an electric current to open or close the contacts of a switch. This is usually done using the help of a coil that attracts the contacts of a switch and pulls them together when activated, and a spring pushes them apart when the coil is not energized.
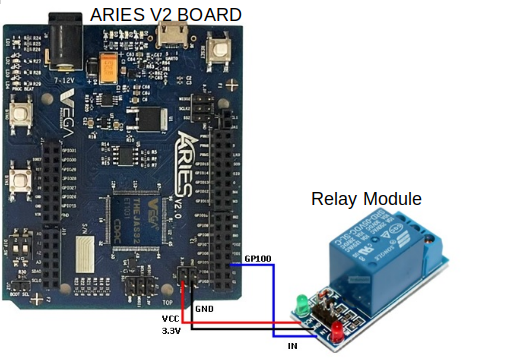
Circuit Diagram
Connect VCC and GND of the relay module to +3.3V and GND respectively of ARIES v2 board. IN pin is used to control the relay. It is an active low pin, meaning the relay will be activated when you pull the pin LOW and it will become inactive when you pull the pin HIGH.
| Relay | ARIES V2 board |
| VCC | 3.3V |
| IN | GPIO0 |
| GND | GND |
Now, for powering up the ARIES v2 board via USB port of a Laptop/Desktop/PC and burning the code into the ARIES v2 board, we have to use a micro USB type B to USB type A cable. The cable should be connected to UART0 port of the ARIES v2 board, and the Laptop/Desktop/PC should be preinstalled with VEGA SDK and Toolchain.
Procedure
After setting up the toolchain and SDK path environments, clean the executable using make clean command.
cd examples/gpio/relay_pgmmake cleanBuild the example program for relay by using make command
make Before transfering the built program to board,ensure that you have connected the UART0 connector of the board to the PC.
Open a new terminal, execute the following command
sudo minicom ariesNow you can see the minicom terminal opened and the board UART terminal is ready.

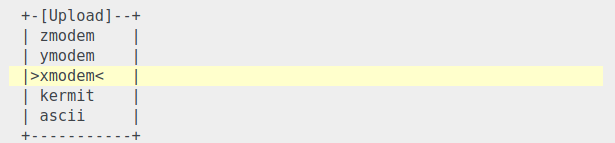
Use CTRL+A S to enter file sending menu and select xmodem by pressing Enter.
In the next window, with Space bar select the relay_pgm.bin file to be transferred. By pressing Enter, transfer process starts.
Wait until the process is completed. The screen should display how much data has been transferred.
After completing transfer, the Program will start to execute.
GREEN LED on the relay module will be ON/OFF when the Relay is ON/OFF