In this tutorial, we will see how we can interface a flame sensor with ARIES V2 board. A Flame Sensor is a device that can be used to detect presence of a fire source or any other bright light sources. In this project, we are using an IR based flame sensor.
Flame Sensor
The flame sensor we are using is based on YG1006 NPN Photo Transistor. The black object at the front of the module is this photo transistor. This photo transistor is coated with black epoxy, making it sensitive to Infrared radiations and this particular Photo Transistor (YG1006) is sensitive to Infrared Radiation in the wavelength range of 760nm to 1100nm. Using this particular type of Flame Sensor, you can detect Infrared Light up to a distance of 100cm within its 60 degrees of detection angle.
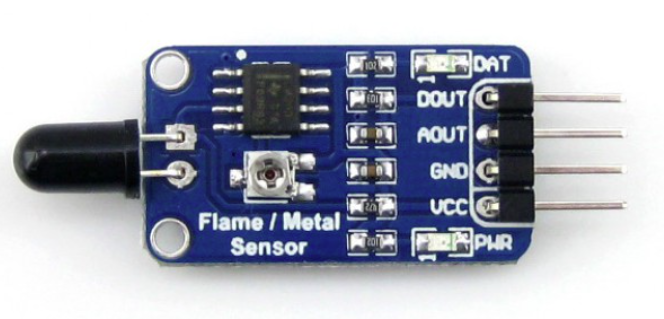
The flame sensor has four pins: VCC, AOUT, DOUT and GND. Connect VCC and GND of flame sensor module to 3.3V and GND respectively of ARIES v2 board. Then connect the AOUT Pin of the flame sensor to the A0 pin of ARIES v2 board for getting the analog output.
| Flame Sensor | ARIES V2 board |
| VCC | 3.3V |
| GND | GND |
| AOUT | A0 |
Components Required
- ARIES v2 Microcontroller
- Flame sensor
- Jumper wires
Note: All of the following boards can be used for this project
Connection Diagram

Now, for powering up the ARIES v2 board via the USB port of a Laptop/Desktop/PC and burning the code into the ARIES v2 board, we have to use a micro USB type B to USB type A cable. The cable should be connected to UART-0 port of the ARIES v2 board, and the Laptop/Desktop/PC should be preinstalled with Arduino IDE and VEGA ARIES boards of latest version.
Procedure
Here we are using Arduino IDE 1.8.19 for testing the code.
Open Arduino IDE
Go to Tools -> Board -> VEGA Processor ARIES Boards -> Select ARIES v2
Go to Tools -> Programmer -> Select VEGA XMODEM
Connect the ARIES v2 board to PC
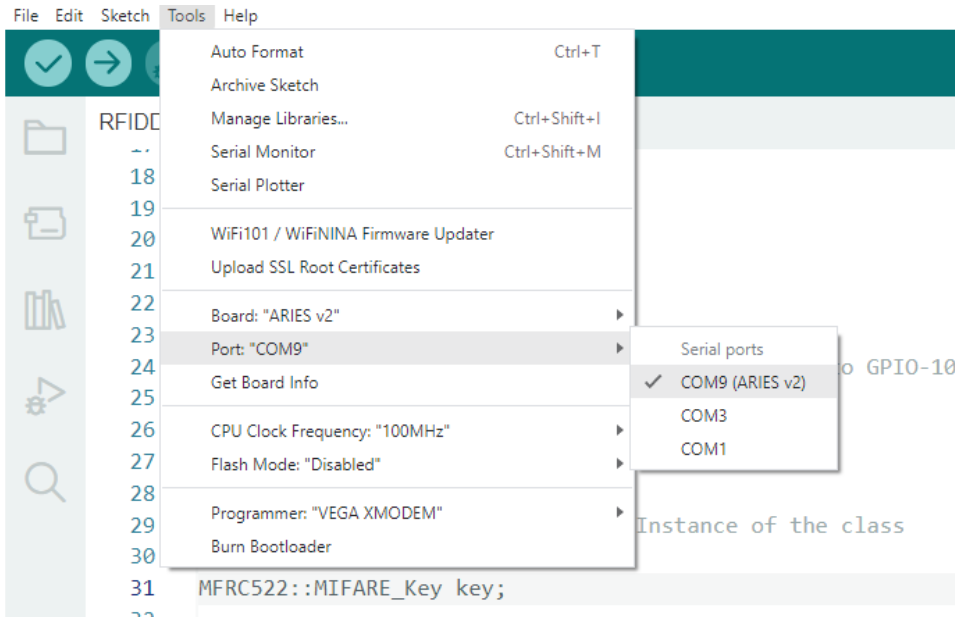
Go to Tools -> Port -> Select the appropriate port
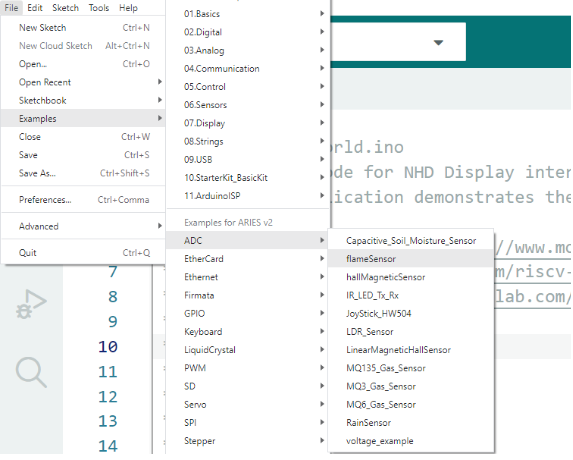
Open File -> Examples -> Examples for ARIES v2 ->ADC -> Open flameSensor example
Output
Once you’ve completed the code, upload it to your ARIES v2.0 board using the Arduino IDE. Wait until the program is uploaded. After completing the uploading the program will start to execute.

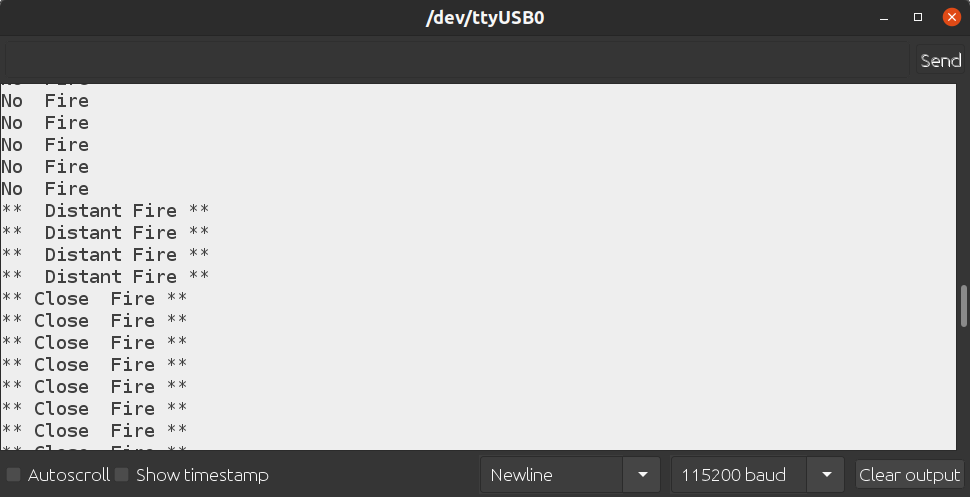
Flame sensor will detect fire for about a small range of less than 3 feets. If holding a flame within “1.5 feet” or “1.5 to 3” feet in front of the sensor; “case 0” (“Close Fire”) or “case 1” (“Distant Fire”) will be activated respectively. If “no flame” is detected; “case 2” will be activated (“No Fire”) which can be seen on the serial monitor. The onboard LEDs will also act as an indicator.
For “No fire” GREEN LED will be ON, For “Distant Fire” BLUE LED will be ON and for “Close fire” RED LED will be ON.
Demonstartion
You can use either a match stick or lighter also for demo purpose. Here I am using flash light from mobile for showing the demo output since we are using an IR based flame sensor.