In this tutorial we will learn how to interface HanRun HR911105A Ethernet Module with ARIES v3 Boards. The ENC28J60 Ethernet Module(10 Pin Package: SSOP) is an industry standard Serial Peripheral Interface (SPI). It is designed to serve as an Ethernet network interface for any controller equipped with SPI.
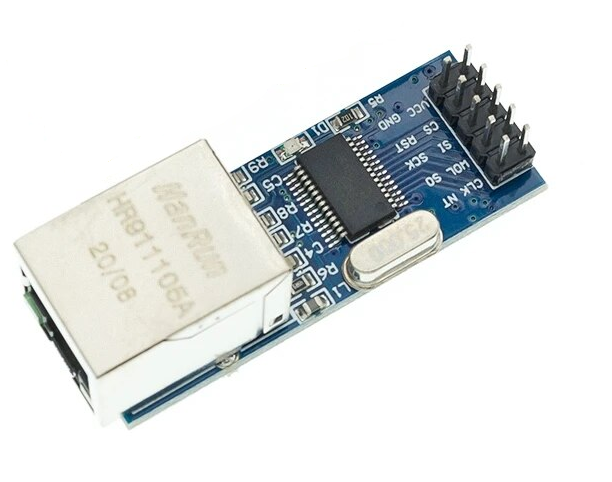
Ethernet Module
This ENC28J60 Ethernet Module(10 Pin Package: SSOP) includes all you need to change your ARIES into an Ethernet device for your network. These days many makers prefer Wi-Fi type network communication. Ethernet still has lots of application and still stays a fast and secure way to connect to network devices.
Features :
- Fully Compatible with 10/100/1000Base-T Networks
- Integrated MAC and 10Base-T PHY
- Supports One 10Base-T Port with Automatic Polarity Detection and Correction
- Supports Full and Half-Duplex modes
- Automatic Programmable Retransmit on Collision
- Programmable Padding and CRC Generation
- Automatic Rejection of Erroneous Packets
- SPI Interface with Clock Speeds Up to 20 MHz
- Chipboard ENC28J60/SS.
- The board 25MHZ crystal.
- The network interface board HR911105A.
- 5 V power supply pin.
- Stable performance.
- For Arduino, SPI, AVR, PIC, LPC, STM32.
Prerequisites
- Windows 10 or above/Linux (64 bit)
- Arduino IDE
- VEGA ARIES Board support package
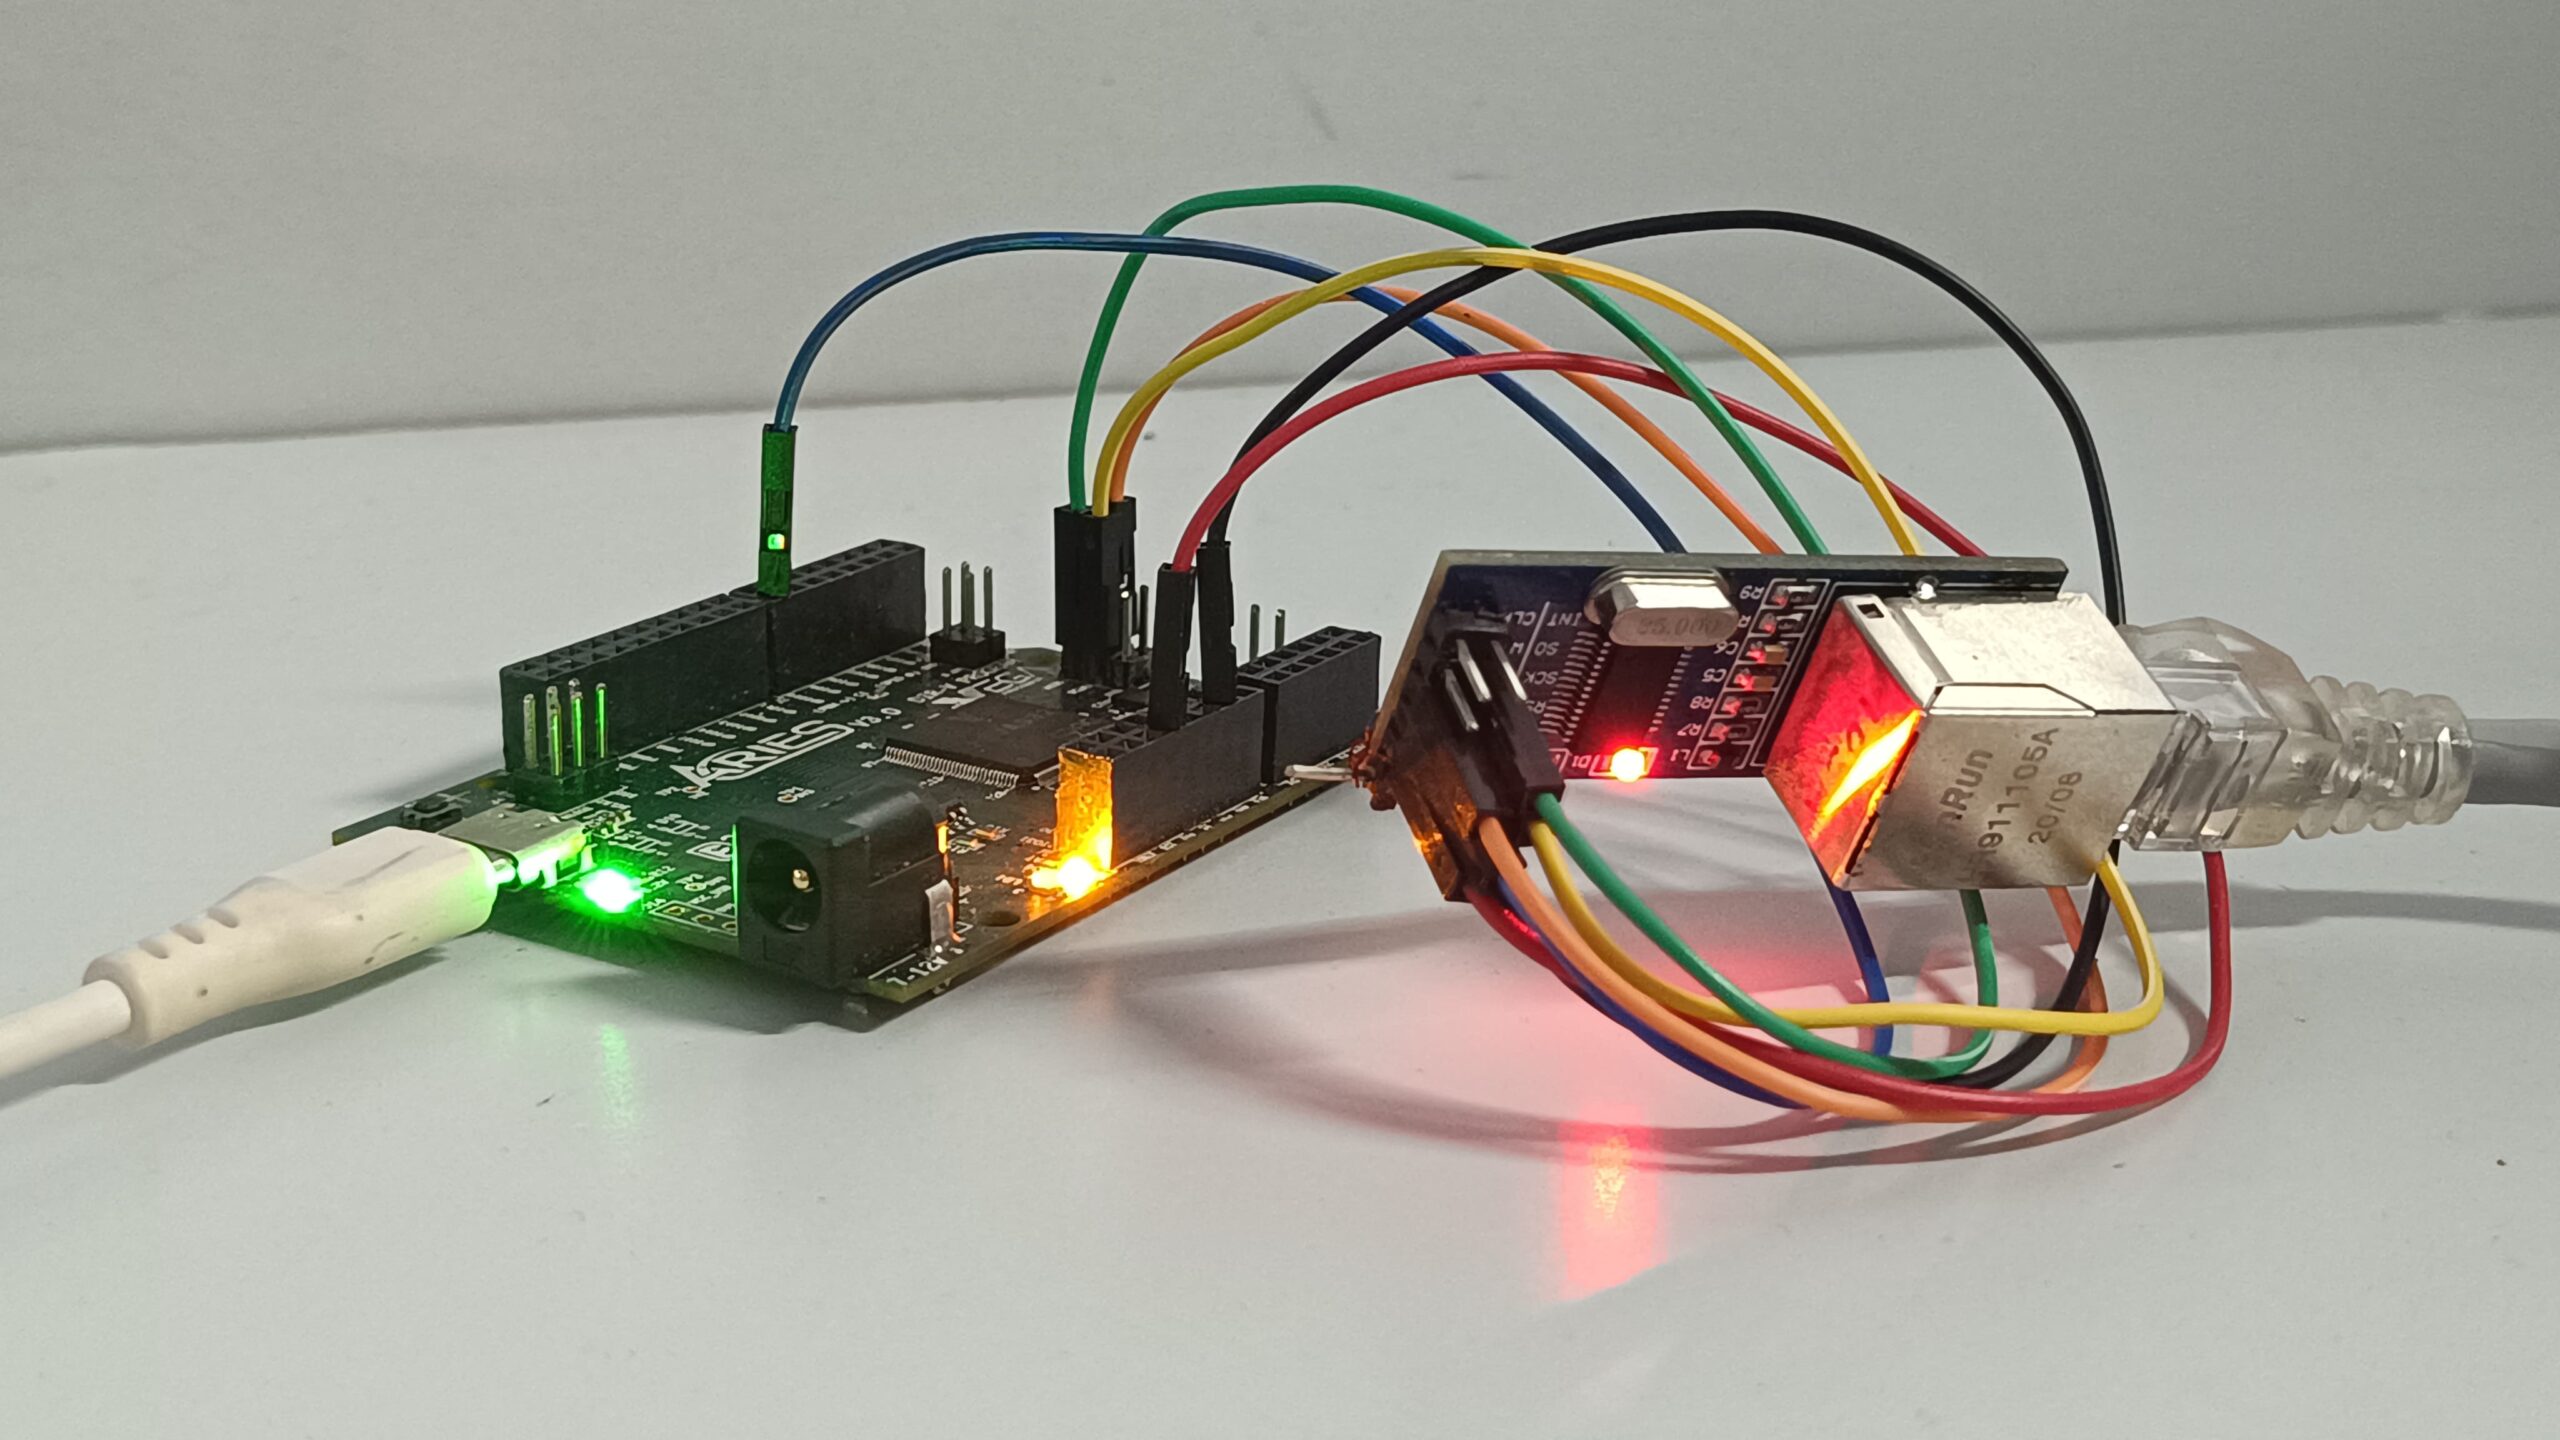
Components Required
- ARIES v3.0 Board
- USB type C to USB type A cable
- HanRun HR911105A Ethernet Module
- Ethernet Cable
- Jumper Wires
Circuit Diagram
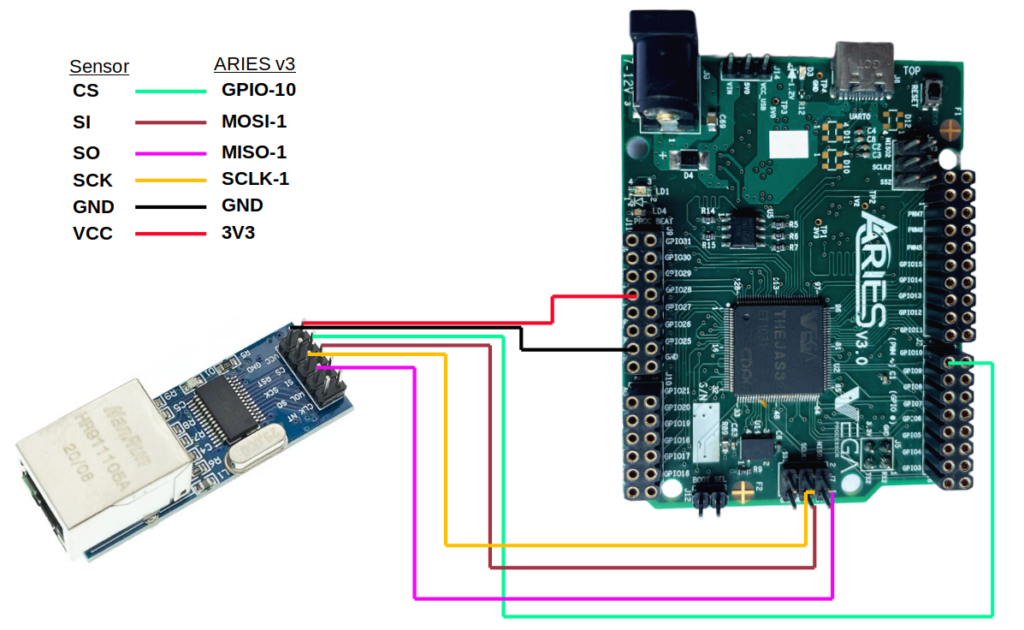
Connections:
| Ethernet Module | ARIES V3 board |
| VCC | 3.3V |
| GND | GND |
| SO | MISO-1 |
| SI | MOSI-1 |
| SCK | SCLK-1 |
| CS | GPIO-10 |
Procedure
Open and set up the Arduino IDE as described in Getting Started with ARIES v3.0.
- Make sure you have selected ARIES v3 Board from Tools -> Board -> VEGA Processor: ARIES Boards -> ARIES v3
- Select Programmer as VEGA XMODEM from Tools -> Programmer -> VEGA XMODEM
- Also select appropriate port from Tools -> Port -> COM* (ARIES Board)

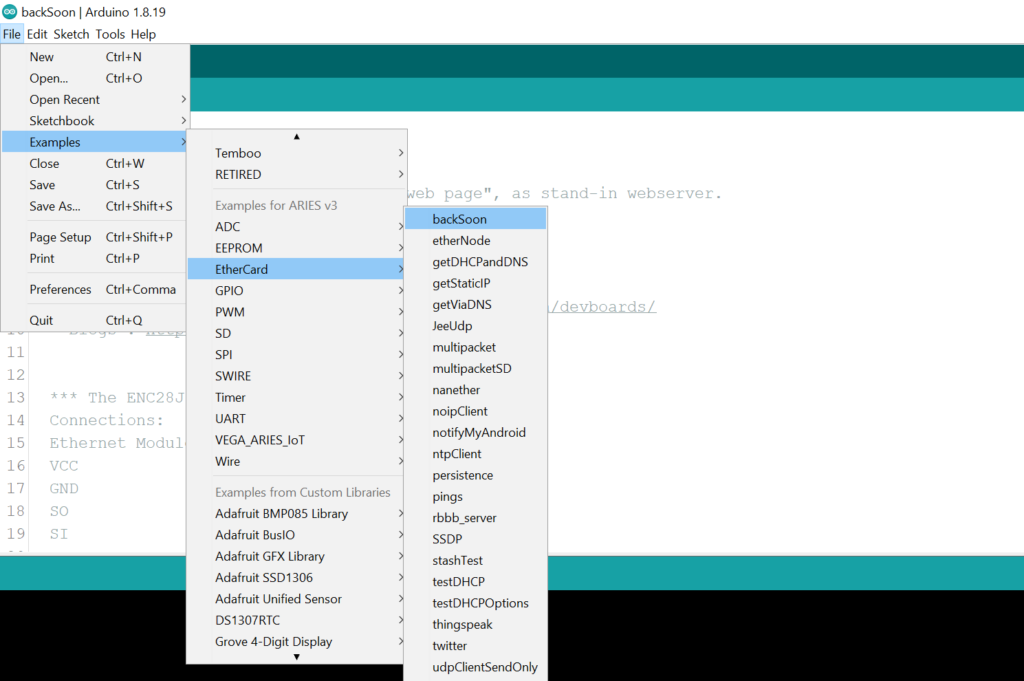
Now, Open Files -> Examples -> Under Examples for ARIES v3 -> EtherCard-> backSoon
Finally Upload the code to ARIES board
Output

Once you’ve uploaded the code, launch the serial monitor at a baud rate of 115200. Enter the IP address displayed as “IP: “ in the Serial Monitor into your web browser. This action will display a placeholder web page stating “Will be back soon,” indicating the functioning of the temporary web server.
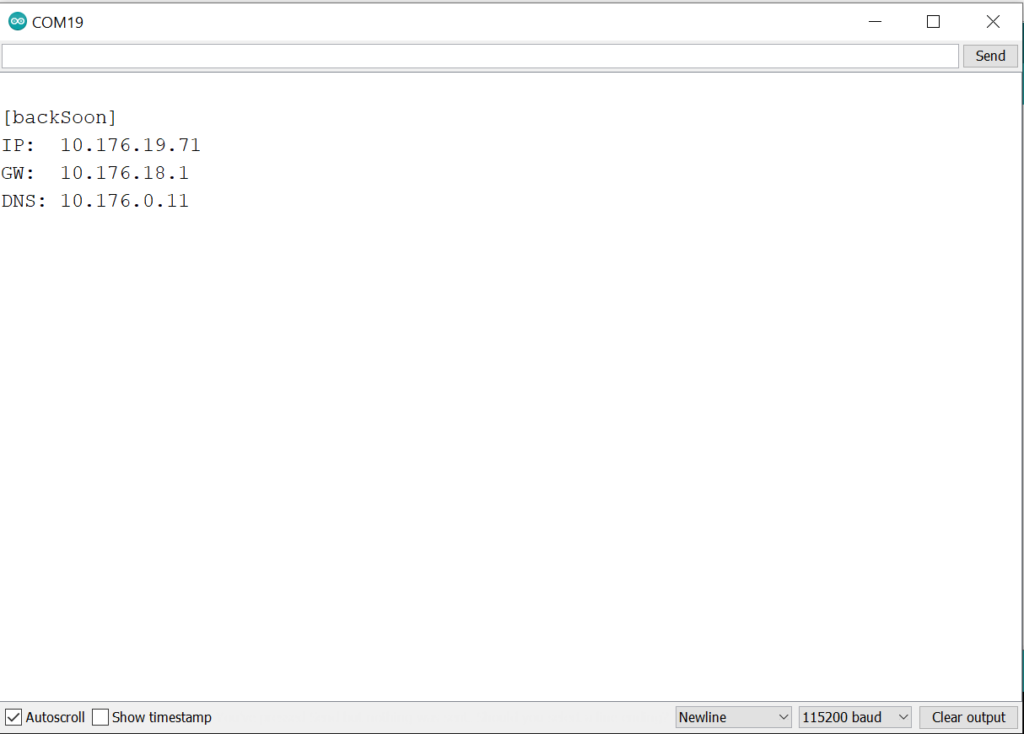
Output in Serial Monitor
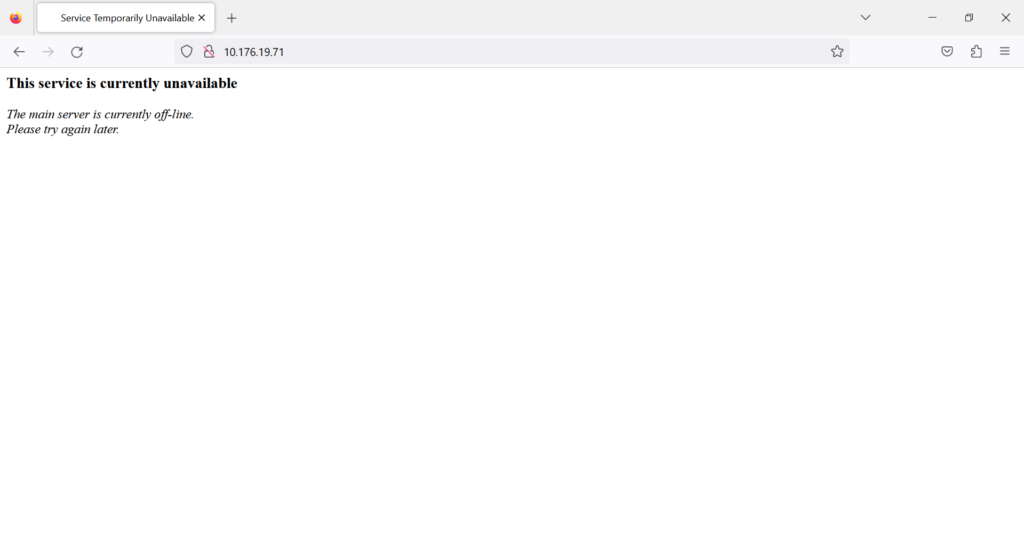
Type the IP shown in Serial Monitor on any web browser to view the standalone web page as output