In this tutorial, we will see how we can interface Buzzer with ARIES v3 board to turn volume of buzzer low-to-high and high-to-low repeatedly using pulse width modulation. Buzzer is a very small and compact 2-pin audio signalling device which can be used in applications like alarm devices, timers, train and confirmation of user input such as a mouse click or keystroke.
Buzzer
The buzzer is a sounding device that can convert electrical signals into sound signals. It is usually powered by DC voltage. According to different designs and uses, the buzzer can emit various sounds such as music, siren, buzzer, alarm, and electric bell.
Buzzer here used is piezoelectric buzzer which uses the piezoelectric effect of the piezoelectric ceramics. It uses the pulse current to drive the vibration of the metal plate to generate sound.
The buzzer can be used by simply powering it using a DC power supply ranging from 4V to 9V. A simple 9V battery can also be used, but it is recommended to use a regulated +5V or +6V DC supply.

Prerequisites
- Windows 10 or above/Linux (64 bit)
- Arduino IDE
- VEGA ARIES Board support package
Components Required
- Piezo Buzzer
- ARIES v3.0 Board
- Jumper Wires
- USB type C to USB type A cable
Circuit Diagram
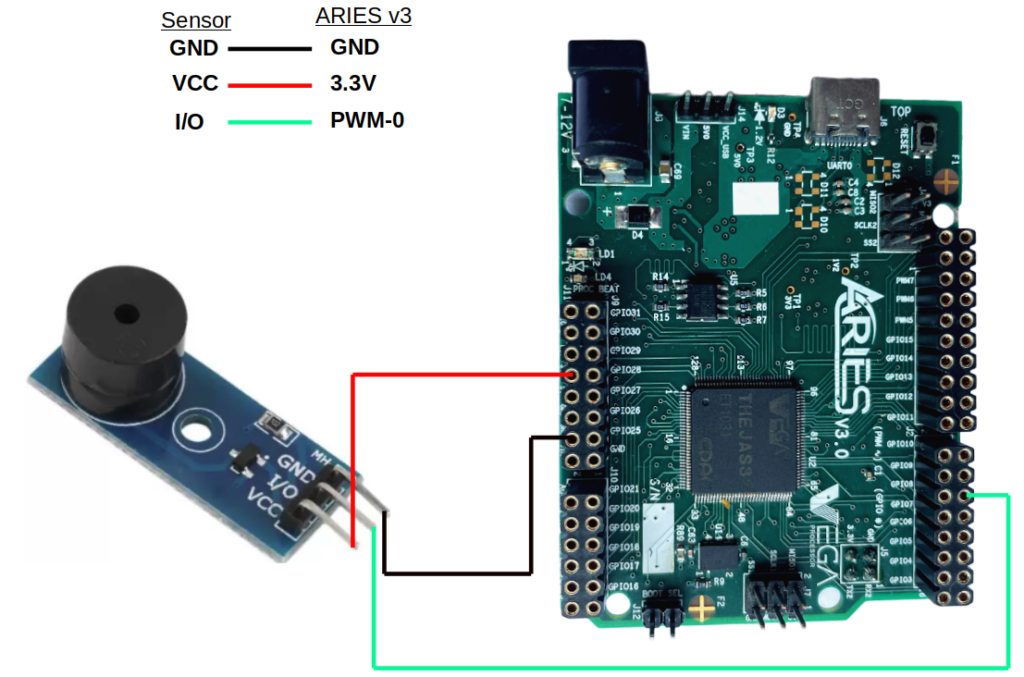
Connection Diagram for buzzer with ARIES v3.0
The Buzzer has three pins: VCC, I/O and GND. Connect VCC and GND of buzzer module to +3.3V and GND respectively of ARIES v3 board(Refer Buzzer datasheet). Then connect the I/O Pin of the Buzzer to the PWM-0 of ARIES v3 board.
Connections:
| Buzzer | ARIES V2 board |
| VCC | 3.3V |
| I/O | PWM-0 |
| GND | GND |
Once we are done with the connections, let’s power up the ARIES v3 board via the USB port of a Laptop/Desktop/PC and burning the code into the ARIES v3 board, we have to use a USB type C to USB type A cable. The cable should be connected to UART-0 port of the ARIES v3 board, and the Laptop/Desktop/PC should be preinstalled with Arduino IDE and VEGA ARIES boards of latest version.
Procedure
Open and set up the Arduino IDE as described in Getting Started with ARIES v3.0.
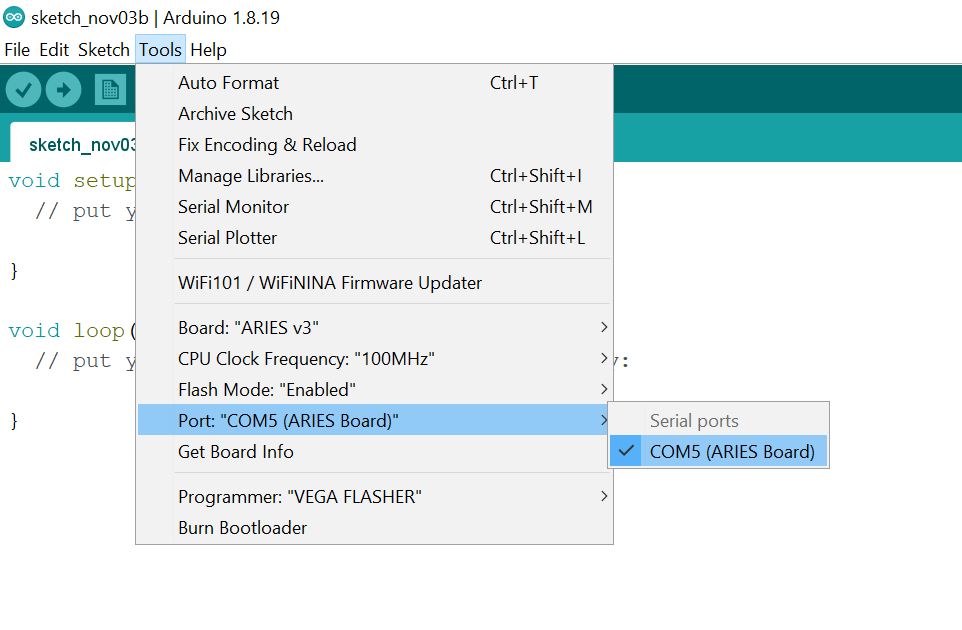
- Make sure you have selected ARIES v3 Board from Tools -> Board -> VEGA Processor: ARIES Boards -> ARIES v3
- Select Flash Mode -> Enabled
- Select Programmer as VEGA FLASHER from Tools -> Programmer -> VEGA FLASHER
- Also select appropriate port from Tools -> Port -> COM* (ARIES Board)
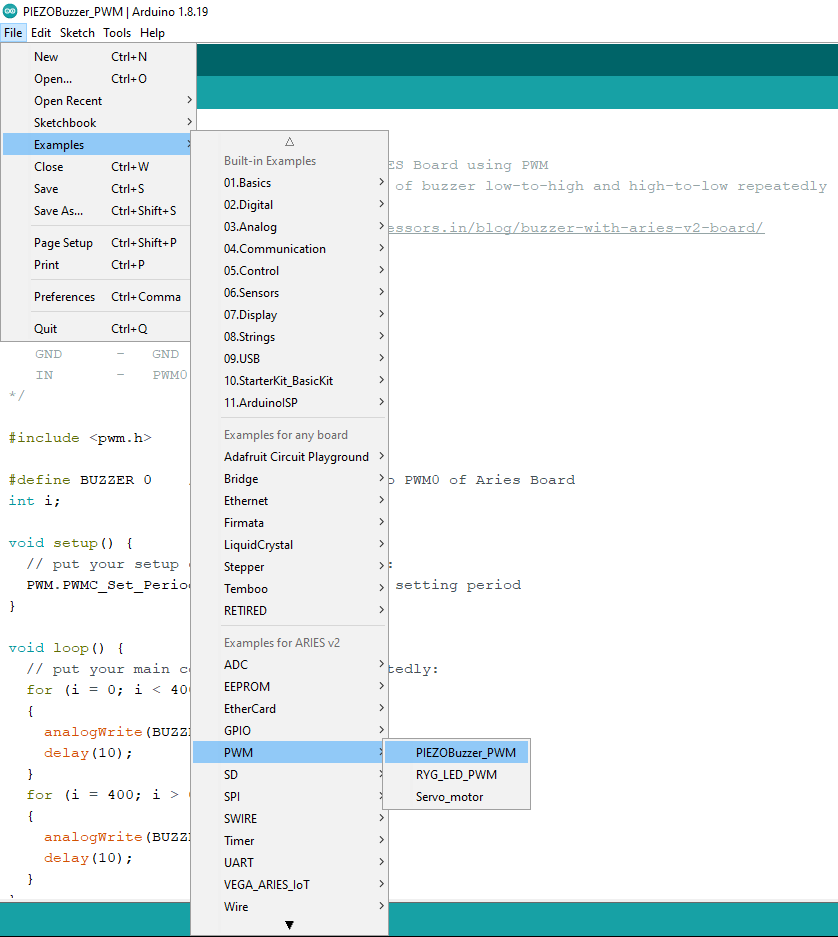
Now, Open Files -> Examples -> Under Examples for ARIES v3 -> PWM ->PIEZOBuzzer_PWM
Finally, let’s Upload the code to ARIES v3 Board.
Output
Once the code is uploaded, the desired tone will be played through the buzzer.
