In this tutorial we will see how we can interface the Capacitive soil moisture Sensor with Aries v2.0 Board.
Soil moisture is basically the content of water present in the soil. This can be measured using a soil moisture sensor which consists of two conducting probes that act as a probe. It can measure the moisture content in the soil based on the change in resistance between the two conducting plates.
The resistance between the two conducting plates varies in an inverse manner with the amount of moisture present in the soil. Soil moisture sensors are essential tools for gardeners and plant enthusiasts, as they provide real-time data on the soil’s moisture level, allowing us to optimize watering schedules and ensure the well-being of our plants.
Specifications:
- Operating Voltage: 3.3 ~ 5.5 VDC.
- Operating Current: 5mA.
- Dimensions mm(LxWxH): 98 x 23 x 4.
- Supports 3-Pin Gravity Sensor interface
- Analog output.
Circuit Diagram:
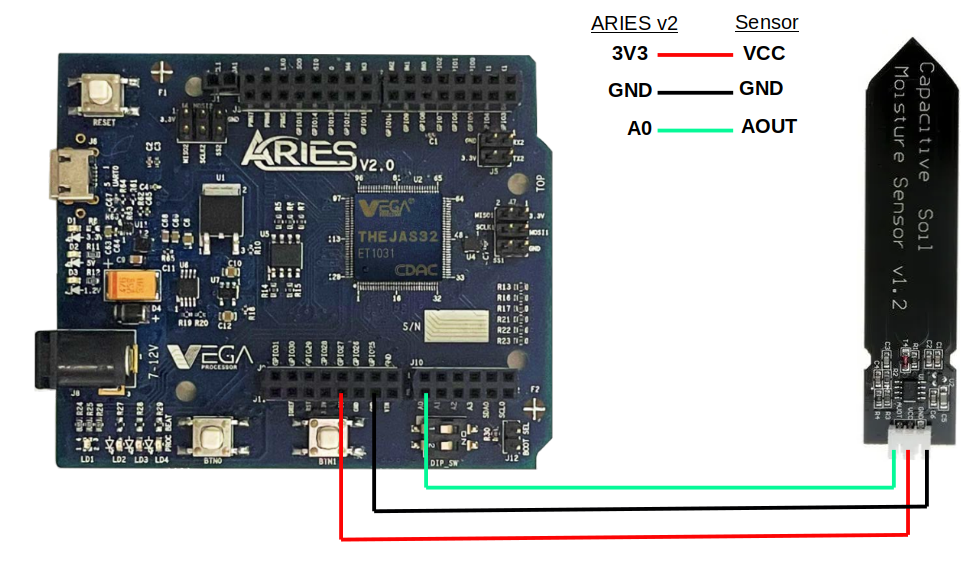
Connections:
| Capacitive soil Moisture Sensor | ARIES V2 board |
| VCC | 3.3 V |
| GND | GND |
| AOUT | A0 |
Now, for powering up the ARIES v2 board via the USB port of a Laptop/Desktop/PC and burning the code into the ARIES v2 board, we have to use a micro USB type B to USB type A cable. The cable should be connected to UART-0 port of the ARIES v2 board, and the Laptop/Desktop/PC should be preinstalled with Arduino IDE and VEGA ARIES boards of latest version.
Note:
Note : The threshold values for different soil moisture sensor will vary. You can use the same demo to interface Soil Moisture Sensor also by changing the threshold values. You can change the threshold values according to your requirements in the code.
Note: All of the following boards can be used for this project
Procedure:
Open Arduino IDE
Go to Tools -> Board -> VEGA Processor ARIES Boards -> Select ARIES v2
Go to Tools -> Programmer -> Select VEGA XMODEM
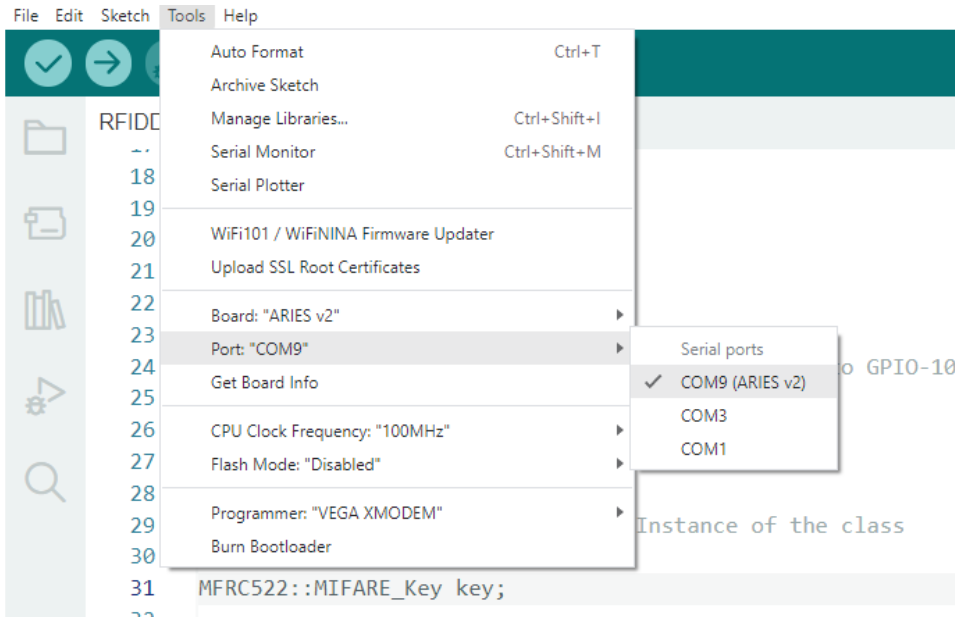
Connect the ARIES v2 board to PC
Go to Tools -> Port -> Select the appropriate port
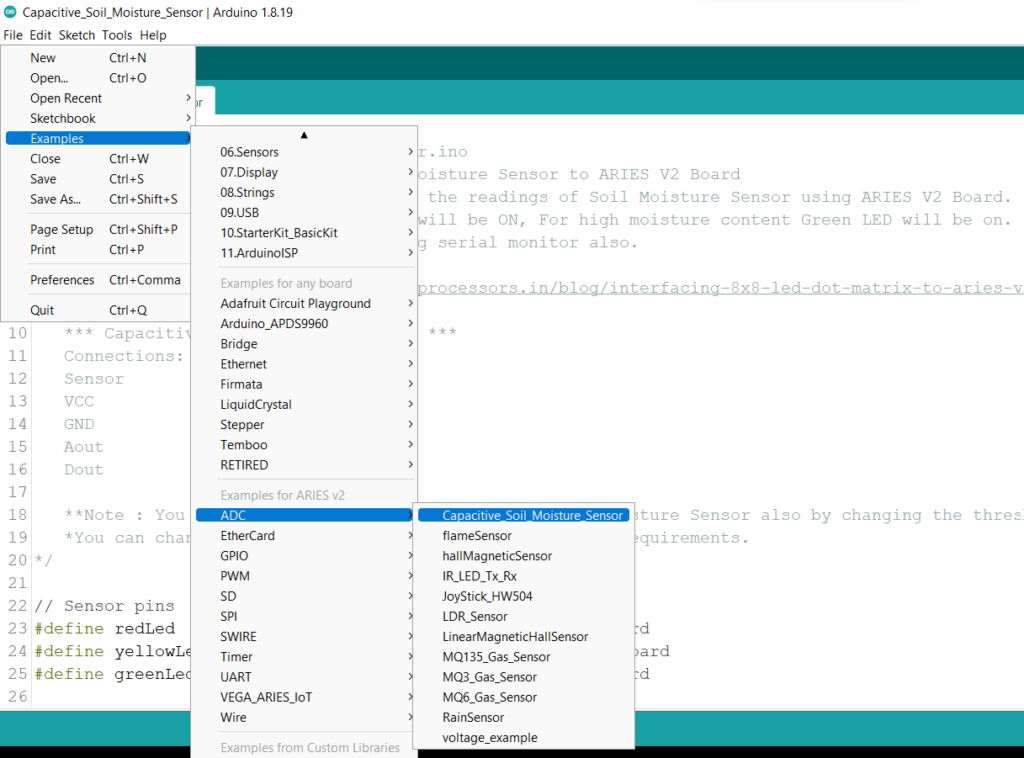
Open File -> Examples -> Examples for ARIES v2 -> ADC -> Open Capacitive_Soil_Moisture_Sensor example
Compile and Upload the code
Output:
Now that you have the soil moisture sensor values, you can display it on the Arduino Serial Monitor or any display. By observing the moisture data, you can adjust your watering schedule accordingly and ensure that your plants receive the right amount of hydration.
If you run the demo code you can see the output in serial monitor along with internal LED indication. If the moisture content is very low ie, below the threshold value then internal RED will blink along with serial monitor output. If there is moderate moisture content then internal Yellow LED will blink. For high moisture content internal Green LED will blink.
