In this tutorial, we will see how we can interface HW-504 Joystick with Aries v2.0 Board.
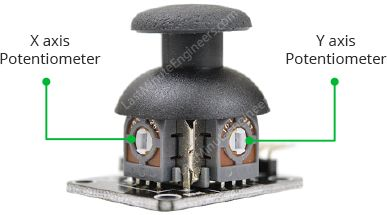
Joystick
A joystick, sometimes called a flight stick, is an input device consisting of a stick that pivots on a base and reports its angle or direction to the device it is controlling. A joystick, also known as the control column, is the principal control device in the cockpit of many civilian and military aircraft, either as a center stick or side stick. It often has supplementary switches to control various aspects of the aircraft’s flight.
Joysticks are often used to control video games, and usually have one or more push buttons whose state can also be read by the computer. Joysticks are also used for controlling machines such as cranes, trucks, underwater unmanned vehicles, wheelchairs, surveillance cameras, and zero-turning radius lawn mowers.
Circuit Diagram:
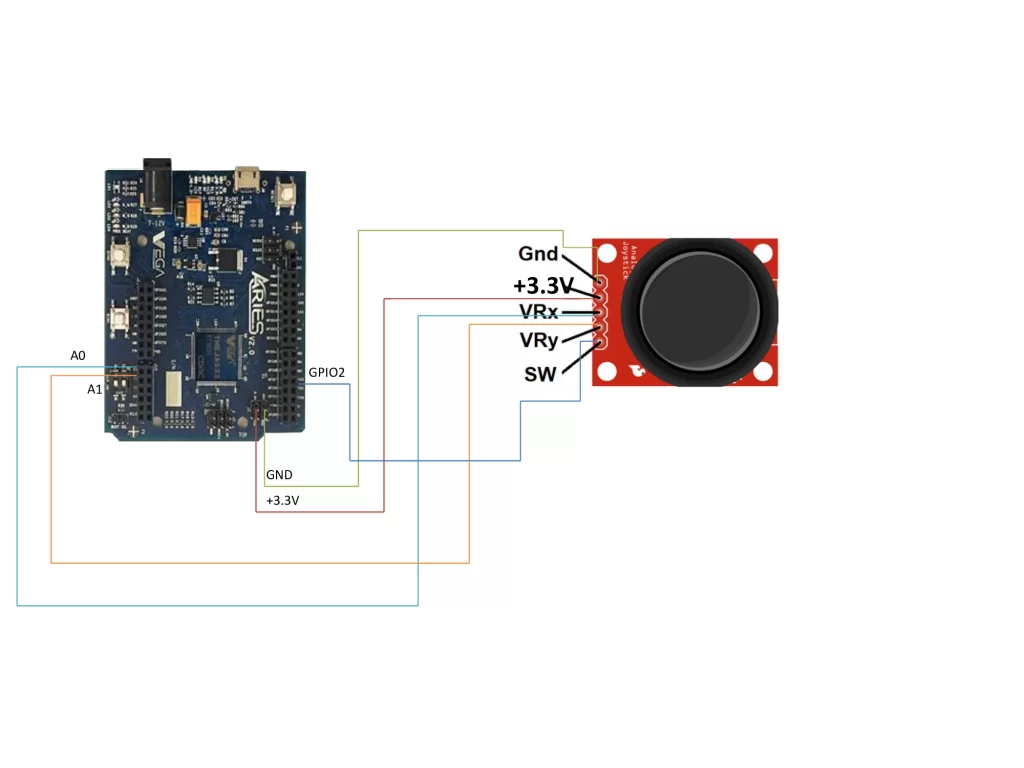
Connections:
| Joystick | ARIES v2 Board |
| VCC | +3.3V |
| VRx | A0 |
| VRy | A1 |
| SW | GPIO2 |
| GND | GND |
Now, for powering up the ARIES v2 board via the USB port of a Laptop/Desktop/PC and burning the code into the ARIES v2 board, we have to use a micro USB type B to USB type A cable. The cable should be connected to the UART0 port of the ARIES v2 board, and the Laptop/Desktop/PC should be preinstalled with VEGA SDK and Toolchain.
Procedure
After setting up the toolchain and SDK path environments are ready, build the example program for the Joystick module by:
cd vega-sdk/examples/adc/joystick_democlean command to clean the executable :
make cleanthen use make command to build it.
makeNow, we can transfer the built program to the board, before transfer please ensure that you have connected the board UART connector to the PC.
Open a new terminal and execute the following command.
sudo minicom ariesNow you can see the minicom terminal opened and the board uart terminal is ready.
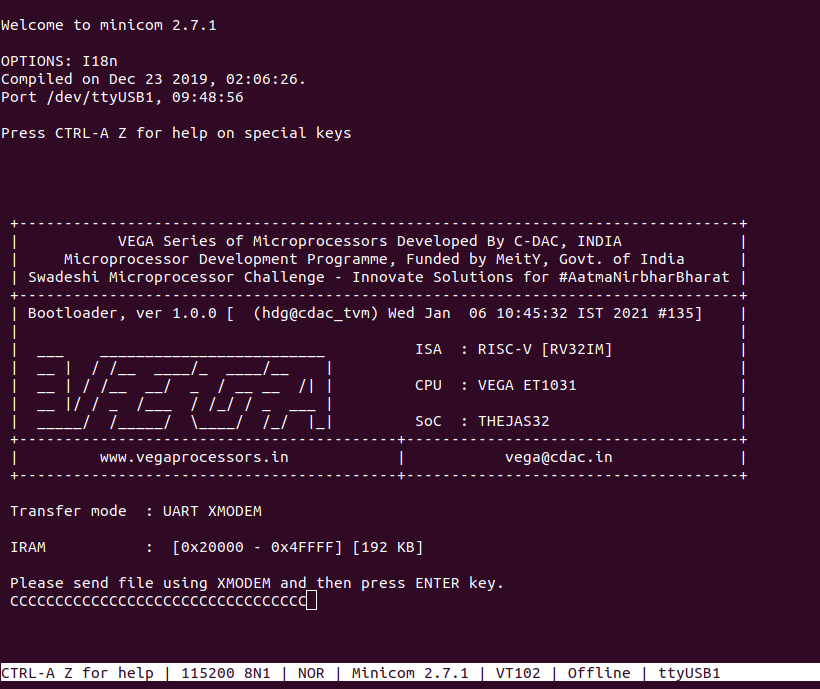
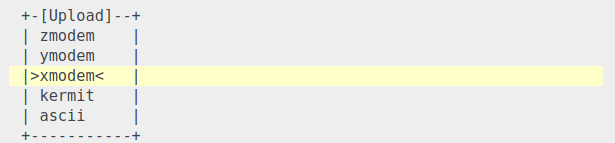
Use CTRL+A S to enter the file sending menu and select xmodem by pressing Enter.
In the next window, with the space bar select the joystick_pgm.bin file to be transferred, by pressing Enter, the transfer process starts.
Wait until the process is completed. The screen should display how much data has been transferred.
After completing the transfer the Program will start to execute.
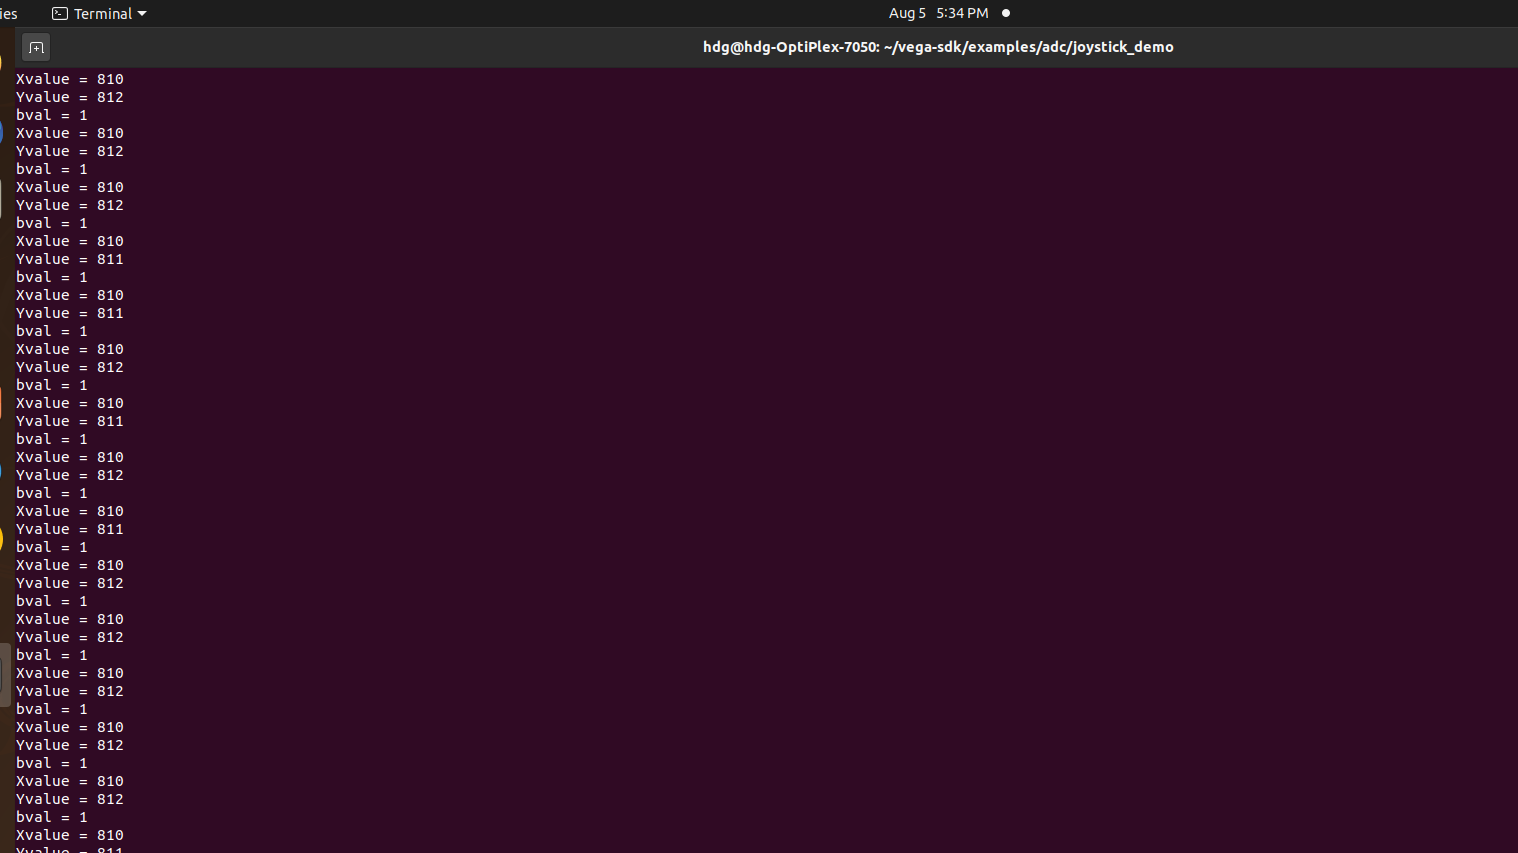
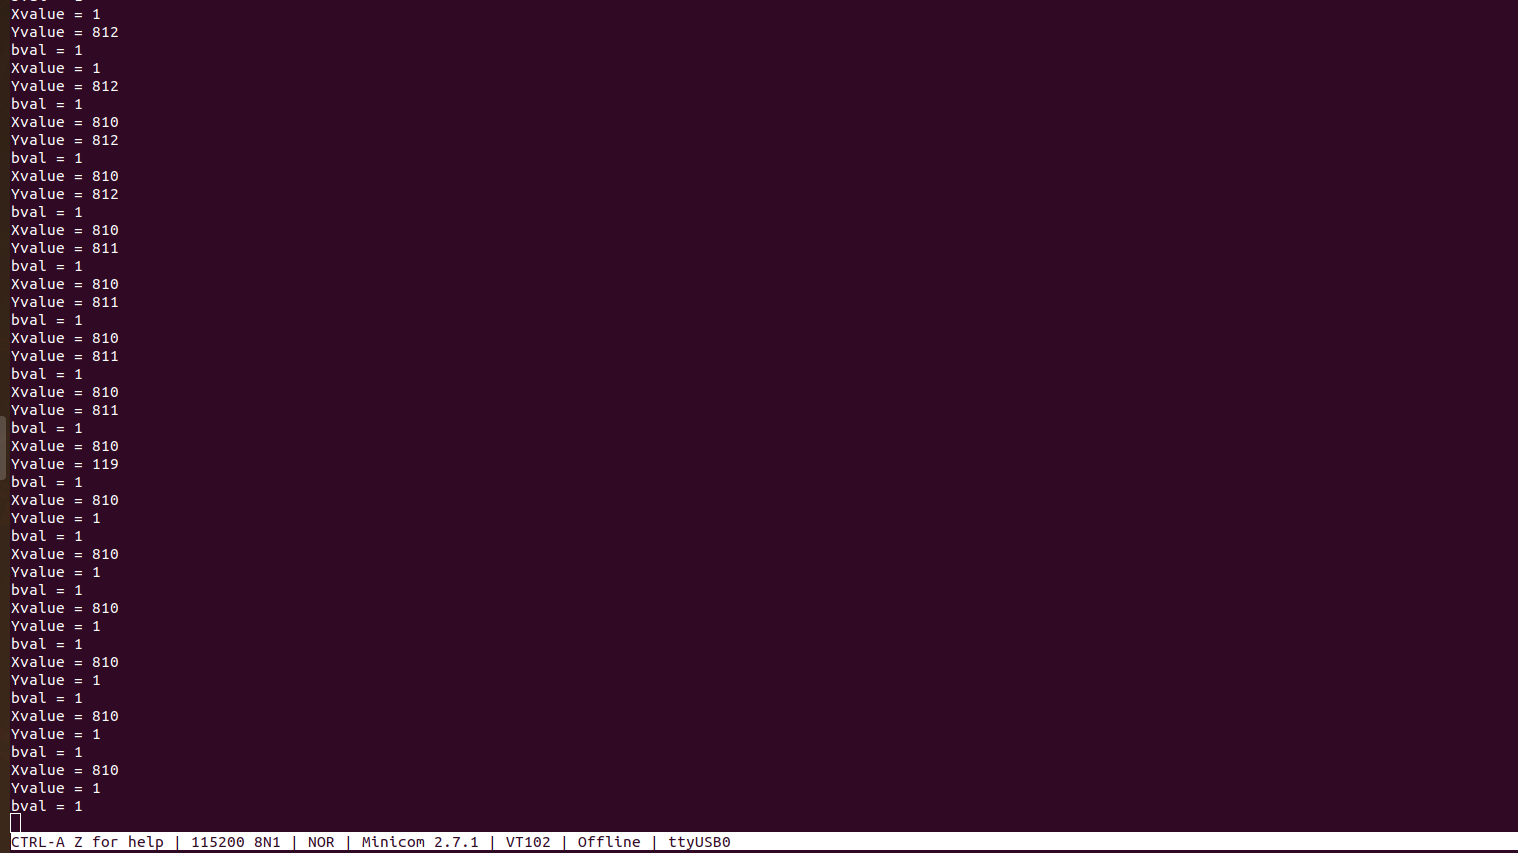
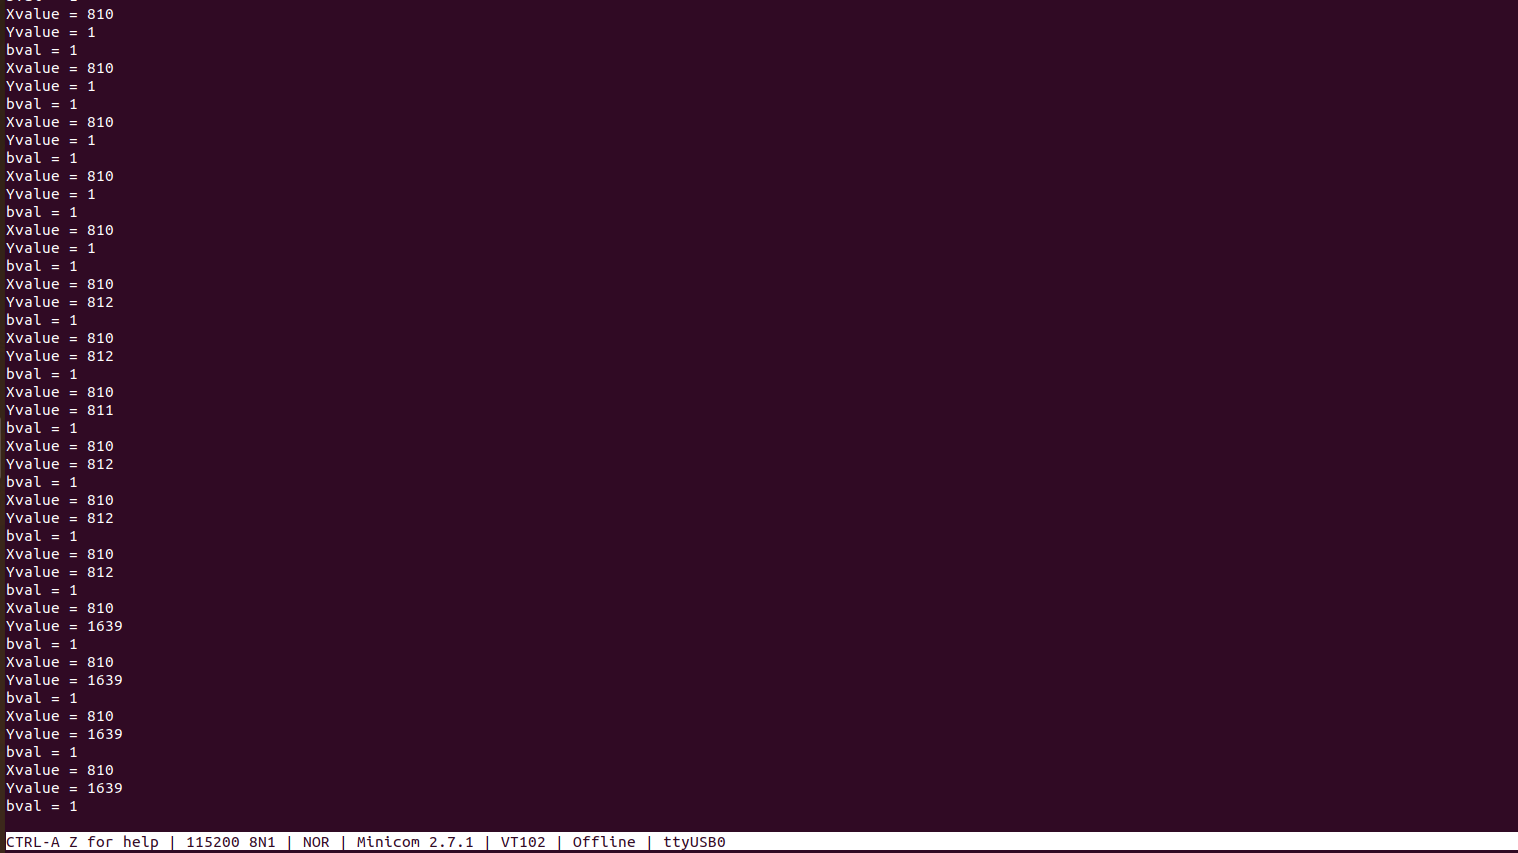
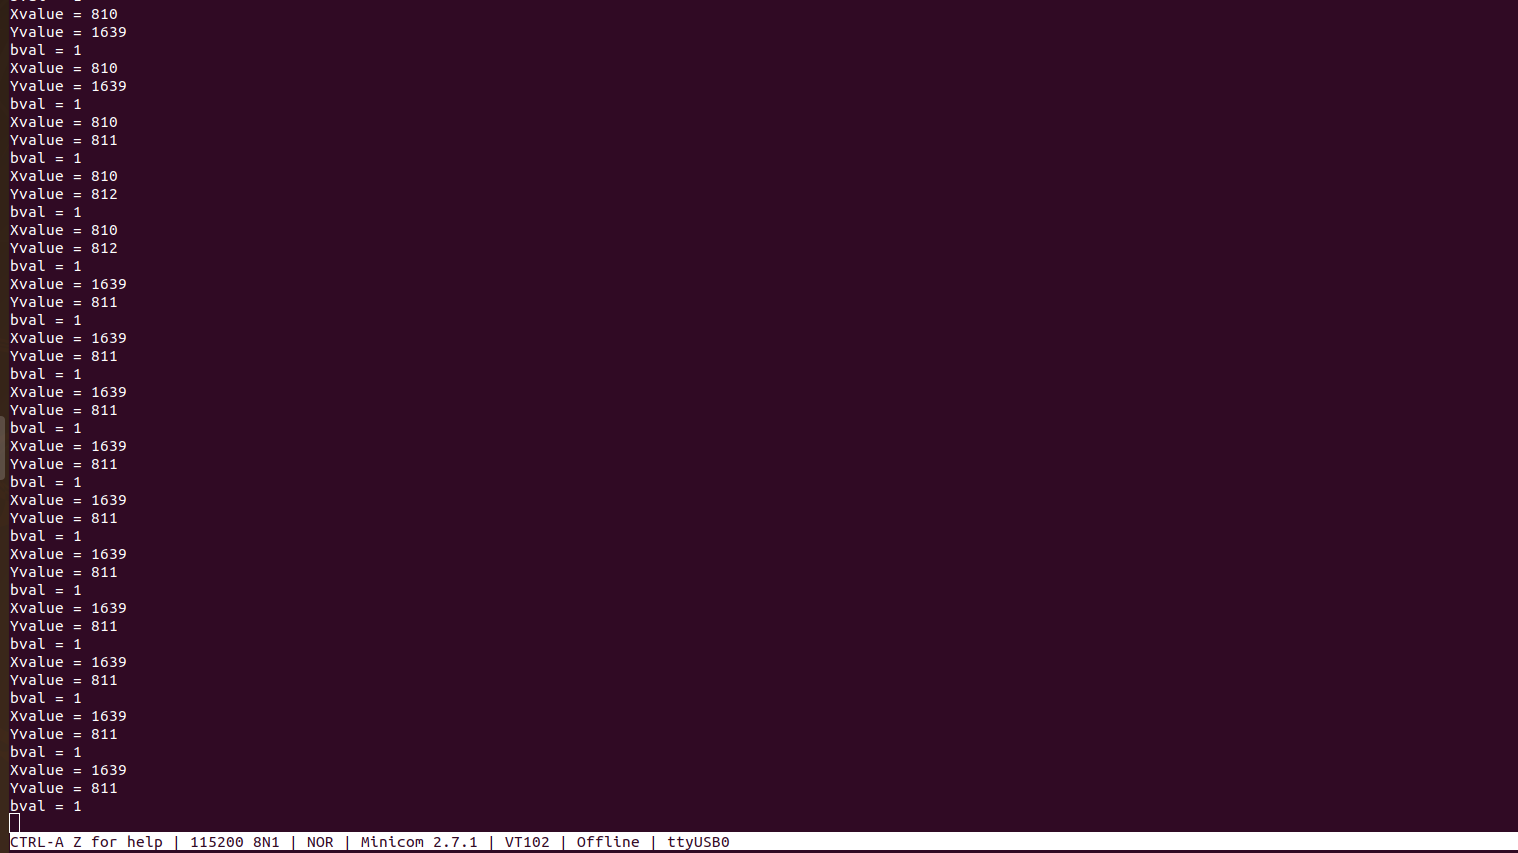
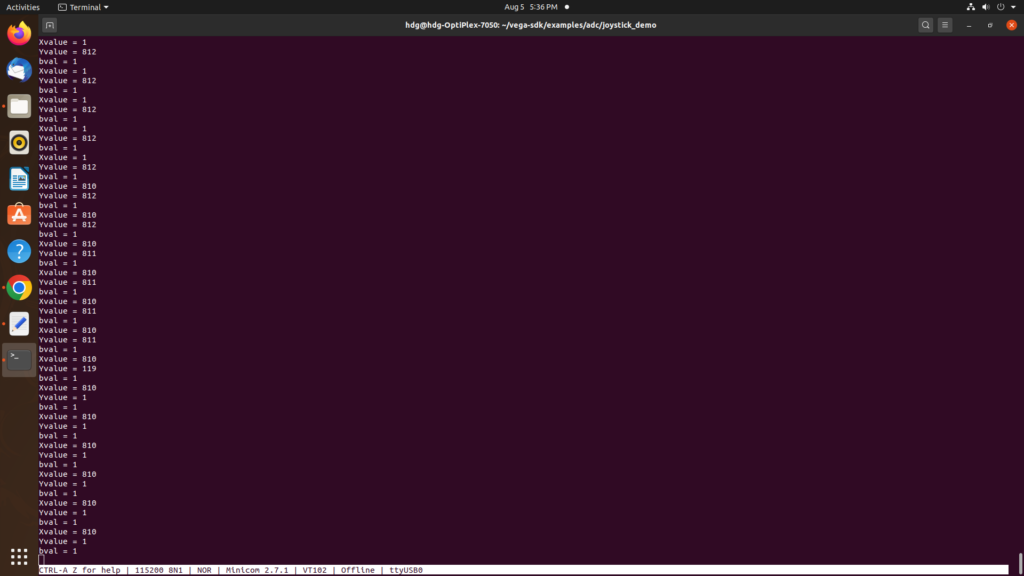
Output:
The output is displayed in the minicom UART terminal:
We get an different analog values as we move joystick in different direction.
Steady state (i.e. At centre position) : Xvalue = 810 , Yvalue = 810 & bval = 1(when unpressed) and bval = 0(when presss).
when we move joystick in a different direction we get an different analog values of i.e Xvalue and Yvalue w.r.t. direction in which it is moving as shown as follows: