NHD stands for Newhaven Display which is a 4.3” Diagonal display with Capacitive Touch Panel with Controller (CTP). There are 6 varities of NHD displays available in the market. Among those we are using HW Rev1.0, NHD-4.3CTP-SHIELD-L display for this demo. There are two different touchscreen options to choose from: capacitive or 4-wire resistive touch. These shields feature
the FT801 (capacitive touch) or the FT800 (resistive touch) embedded video engine by FTDI which may be used to develop and demonstrate the functionality of the FT80X IC’s and Newhaven’s 4.3” touchscreen TFT displays. A micro SD slot also comes as a built-in standard allowing additional storage space for more complex code. This eliminates any memory constraints of the microcontroller board.
COMPONENTS NEEDED:
- ARIES v2 Microcontroller
- NHD-4.3CTP-SHIELD-L display
- Jumper wires
Note: All of the following boards can be used for this project
Circuit Diagram:
Refer the block diagram below to connect the NHD display with Aries v2 board.
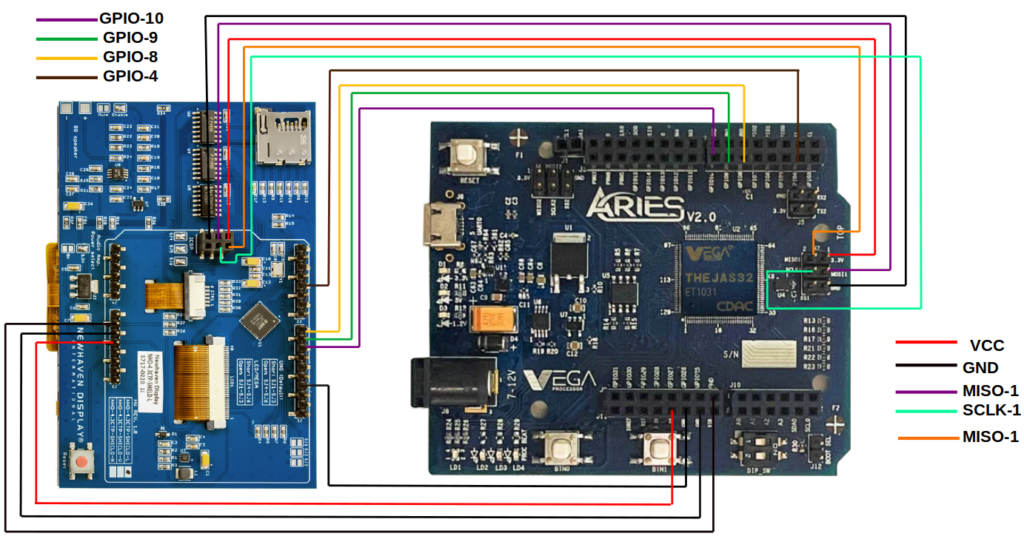
Connections
| NHD DISPLAY | ARIES V2 board |
| J1 Interface | |
| GND | GND |
| 10 | GPIO-10 |
| 9 | GPIO-9 |
| 8 | GPIO-8 |
| J2 Interface | |
| 4 | GPIO-4 (Chip Select Signal) |
| J3 Interface | |
| 5V | 5V (Supply Voltage for Module (+5V)) |
| GND | GND |
| GND | GND |
| J5 Interface | |
| MISO | MISO-1 (SPI MISO signal (Default)) |
| 5V | 3.3V |
| SCK | SCLK-1 (SPI SCK signal (Default)) |
| MOSI | MOSI-1 (SPI MOSI signal (Default)) |
| GND | GND |
Now, for powering up the ARIES v2 board via the USB port of a Laptop/Desktop/PC and burning the code into the ARIES v2 board, we have to use a micro USB type B to USB type A cable. The cable should be connected to UART-0 port of the ARIES v2 board, and the Laptop/Desktop/PC should be preinstalled with Arduino IDE and VEGA ARIES boards of latest version.
Procedure:
Open Arduino IDE
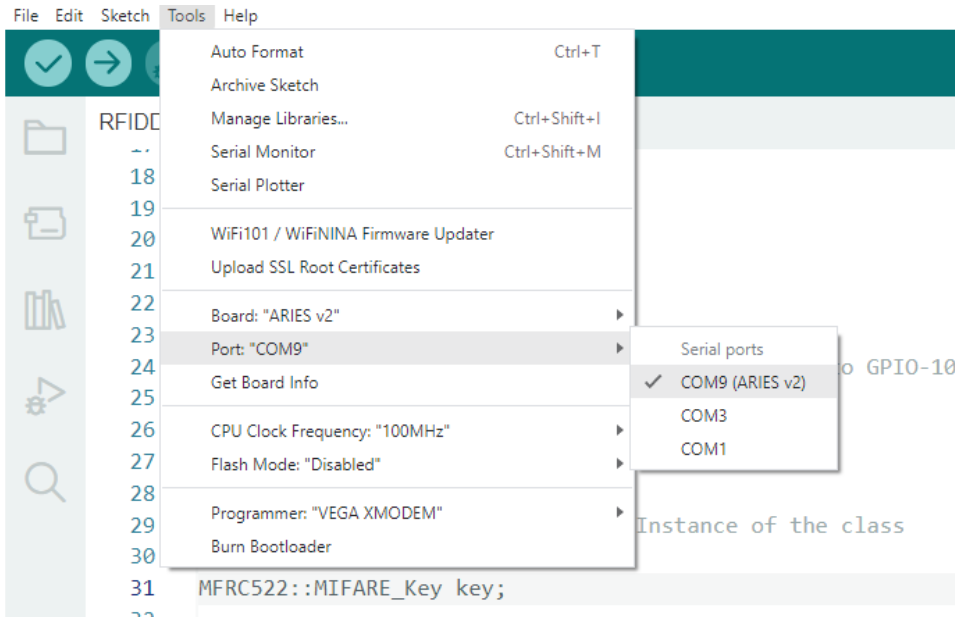
Go to Tools -> Board -> VEGA Processor ARIES Boards -> Select ARIES v2
Go to Tools -> Programmer -> Select VEGA XMODEM
Connect the ARIES v2 board to PC
Go to Tools -> Port -> Select the appropriate port
Download the Required Library for running this demo from the below given link:
Required Library: https://gitlab.com/riscv-vega/vega-sensor-libraries/display/nhd_display
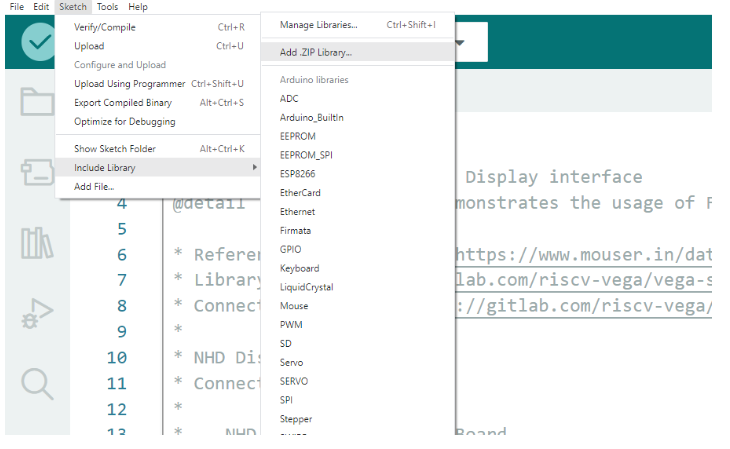
For adding this library you can either extract the zip file inside Arduino folder or you can follow the below step:
Go to Sketch -> Include Libraries -> Add .ZIP Library -> Go to the folder where you have downloaded nhd_display library -> Select your Library zip file -> Click OK.
After adding the library,
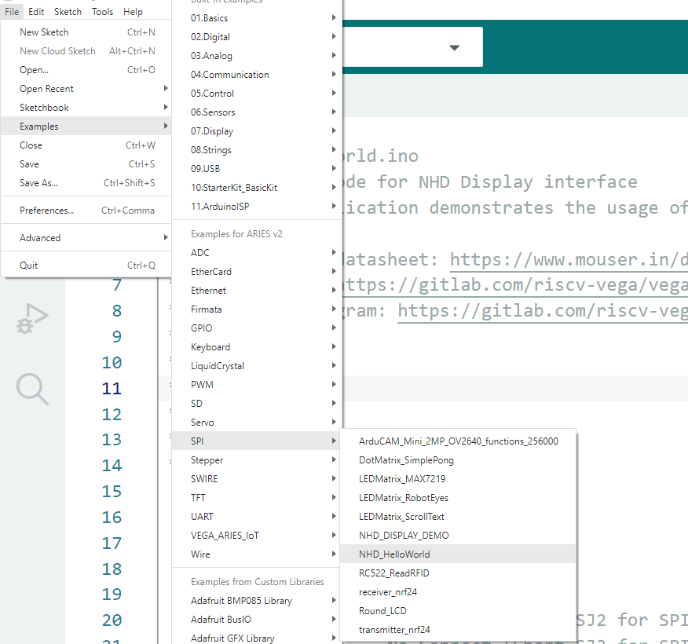
Open File -> Examples -> Examples for ARIES v2 -> SPI -> Open NHD_HelloWorld example
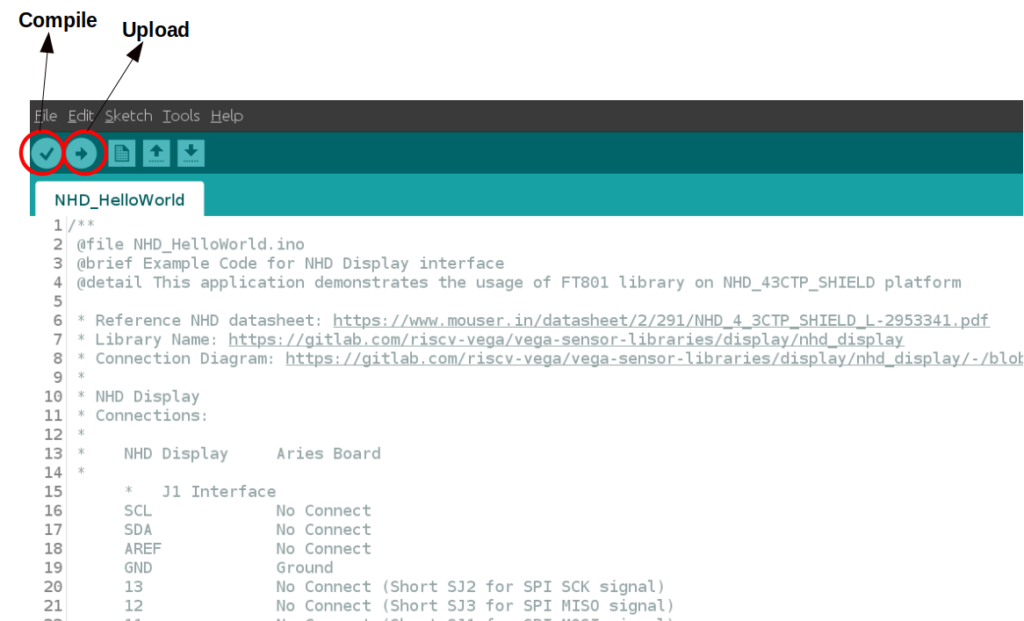
Compile and Upload the code
Output
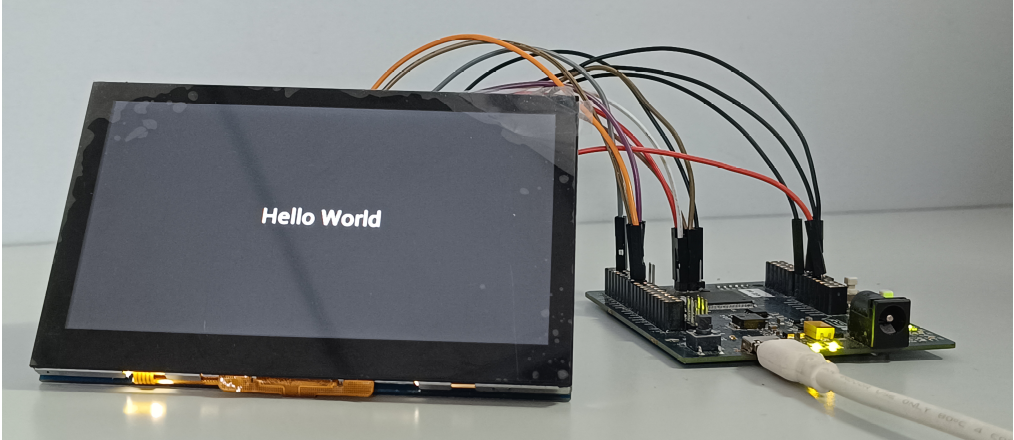
Once you’ve completed the code, upload it to your ARIES v2.0 board using the Arduino IDE. Wait until the program is uploaded. After completing the uploading the program will start to execute.The NHD display Screen shows “Hello World” in display as follows:
Once you have done this program, you can try the other example provided.
More Examples
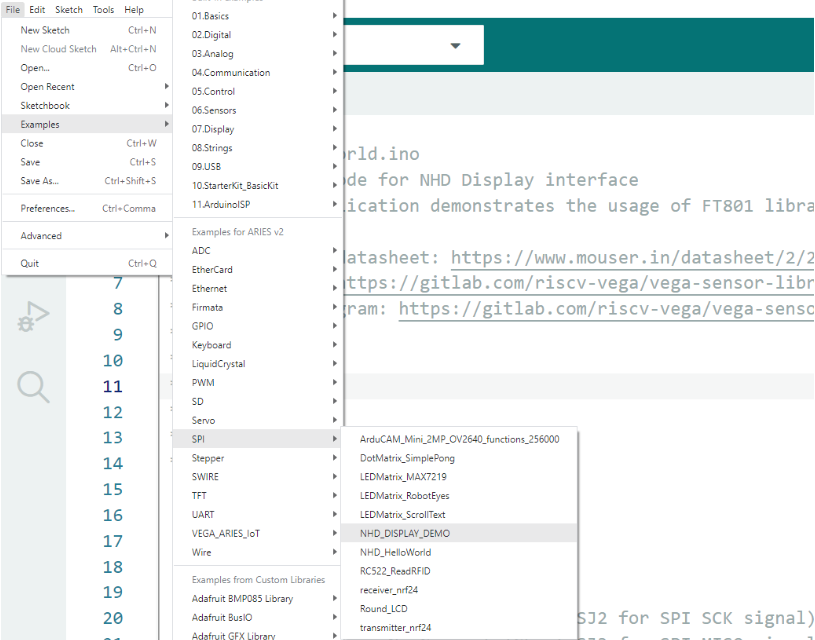
Open File -> Examples -> Examples for ARIES v2 -> SPI -> Open NHD_Display_Demo example
Compile and Upload the code
Output:
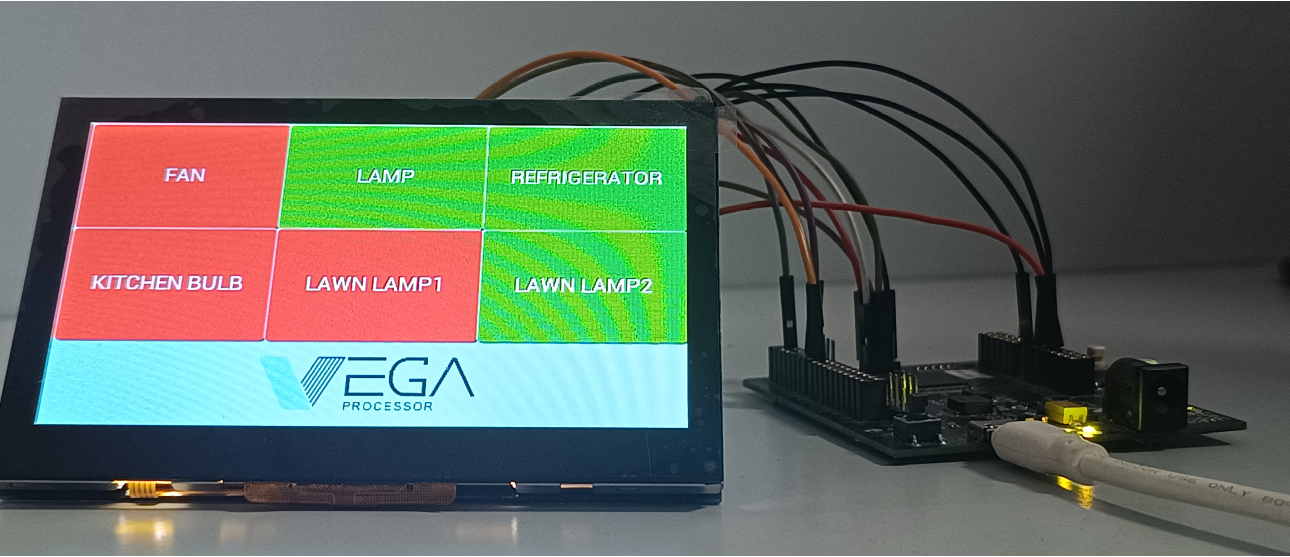
Upload the above NHD_Display_Demo code to your ARIES v2.0 board using the Arduino IDE. Wait until the program is uploaded. Once the uploading is done, program will start to execute. The NHD display Screen will displays as follows:

Since this is a touch display you can use this in your IoT projects for controlling different objects. Once the code is uploaded all the widgets will be in red colour indicating all the associated objects are turned OFF and when you touch any of the widgets provided it will turn into green colour indicating that the corresponding widget is ON.