In this tutorial, we will see how we can interface the ISD1820 voice recorder with ARIES V3 board. The ISD1820 voice recorder can be used to record and play sounds.
Components Required
- ARIES v3 Microcontroller
- ISD1820 voice recorder
- Jumper wires
- FBS50D 0.5W 8 Ohm Speaker
ISD1820 voice recorder
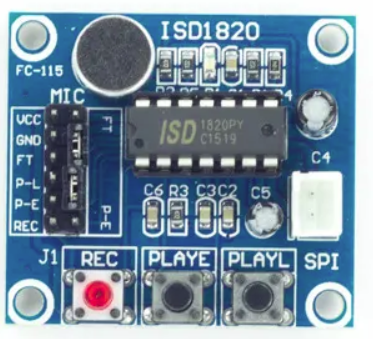
Voice Record Module is based on ISD1820, which a multiple‐message record/playback device. It can offers true single‐chip voice recording, no‐volatile storage, and playback capability for 8 to 20 seconds. The sample is 3.2k and the total 20s for the Recorder.
This module use is very easy which you could direct control by push button on board or by Microcontroller such as ARIES,Arduino, STM32, ChipKit etc. From these, you can easily control record , playback and repeat and so on. For more details refer the datasheet of ISD1820.
Features
Push-button interface, playback can be edge or level activated
Automatic power-down mode
On-chip 8Ω speaker driver
Signal 3V Power Supply
Can be controlled both manually or by MCU
Sample rate and duration changable by replacing a single resistor
Record up to 20 seconds of audio
Connection Diagram
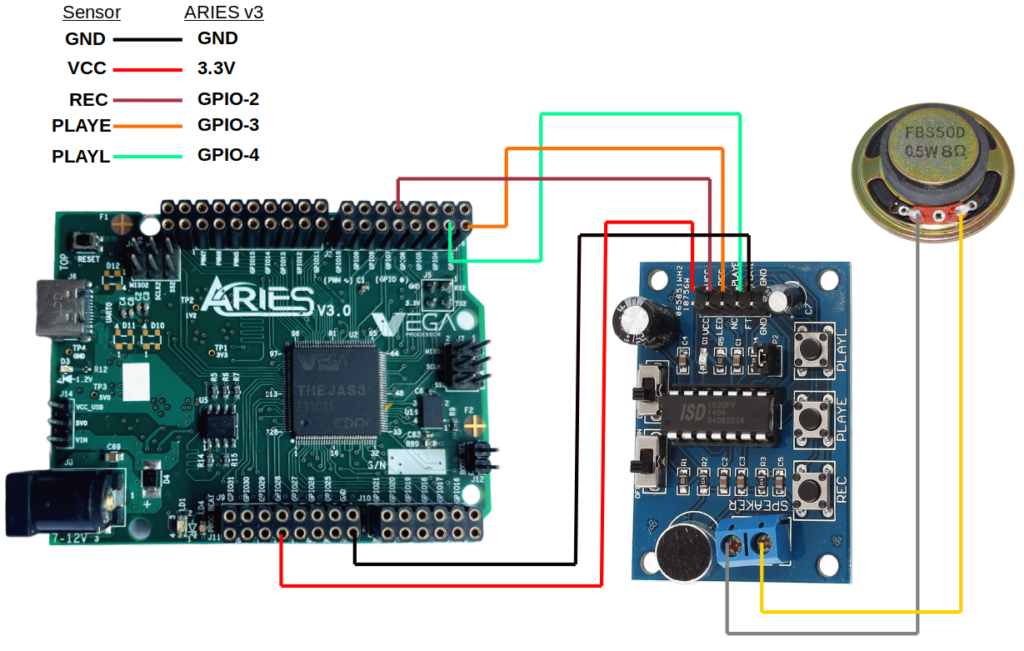
For the below example, the ISD1820 voice recorder connection has six pins. Connect VCC of ISD1820 to 3.3V of ARIES board. Connect GND pin of ISD1820 to GND pin of ARIES board. Now connect PLAY-E of ISD1820 to GPIO-3 of ARIES, PLAY-L of ISD1820 to GPIO-4 of ARIES and REC of ISD1820 to GPIO-2 of ARIES board. Connect the 2 Green pins on other side to the speaker module for hearing sounds.
| ISD1820 voice recorder | ARIES V3 board |
| VCC | 3.3V |
| GND | GND |
| REC | GPIO-2 |
| P-E | GPIO-3 |
| P-L | GPIO-4 |
Now, for powering up the ARIES v3 board via the USB port of a Laptop/Desktop/PC and burning the code into the ARIES v3 board, we have to use a micro USB type C to USB type A cable. The cable should be connected to UART-0 port of the ARIES v3 board, and the Laptop/Desktop/PC should be preinstalled with Arduino IDE and VEGA ARIES boards of latest version.
Procedure
Here we are using Arduino IDE 1.8.19 in Ubuntu OS for testing the code.
Open Arduino IDE
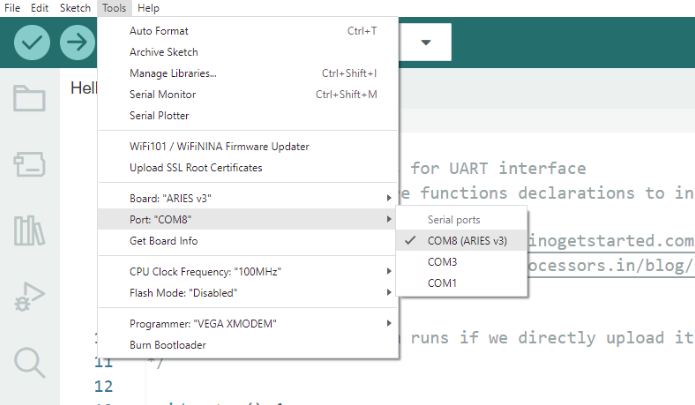
Go to Tools -> Board -> VEGA Processor ARIES Boards -> Select ARIES v3
Go to Tools -> Programmer -> Select VEGA XMODEM
Connect the ARIES v3 board to PC
Go to Tools -> Port -> Select the appropriate port
Open File -> Examples -> Examples for ARIES v3 ->GPIO -> Open ISD1820_Voice_Recorder example
Output
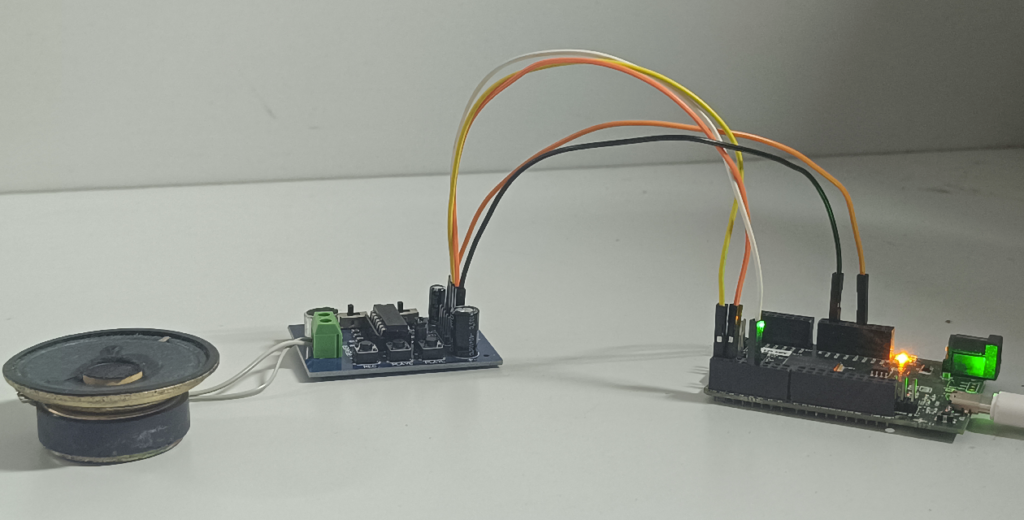
Once you’ve completed the code, upload it to your ARIES v3.0 board using the Arduino IDE. Wait until the program is uploaded. After completing the uploading, the program will start to execute.
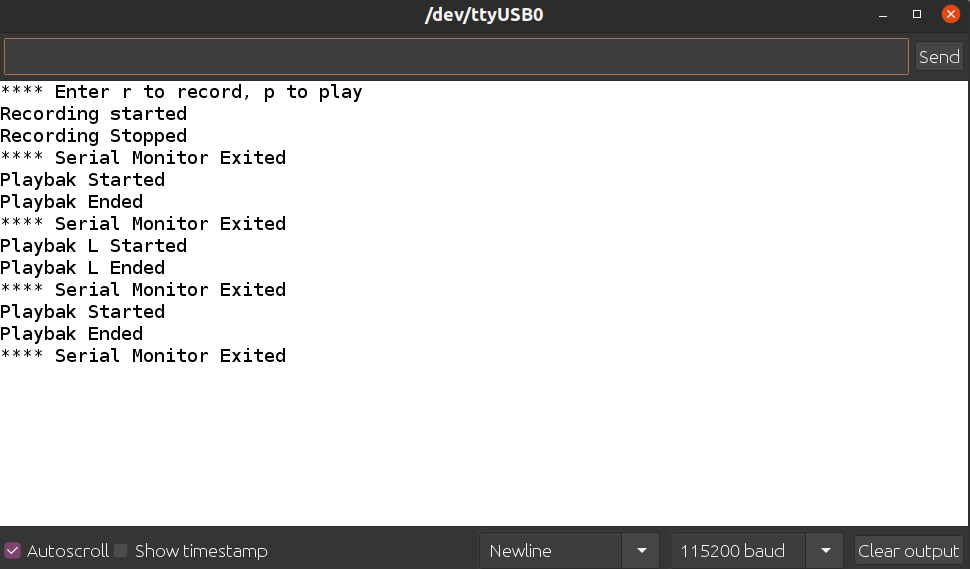
When you upload the code, the serial monitor will display the following: “Enter r to record, p to play”. Press the “r” on keyboard and press ‘send’ in serial Monitor. Now the recording will get started. Record the things you want to hear. Then type “p” and press ‘send’ button in the serial monitor to hear the recording once. Type “l” and press ‘send’ button in the serial monitor to hear the recording repeatedly in a loop.