In this tutorial, we are going to understand, how to make a Demo Industrial Robot using EEPROM and ARIES v2 Board. In addition to that, we use a potentiometer for generating the values and a servo motor for the corresponding displacement. An industrial robot is a robot system used for manufacturing. Industrial robots are automated, programmable, and capable of movement on three or more axes. As we already said, this tutorial will only give you the basics to train and program a robot using EEPROM and ARIES v2 Board as the main components.
How To Build ??? Main Components.
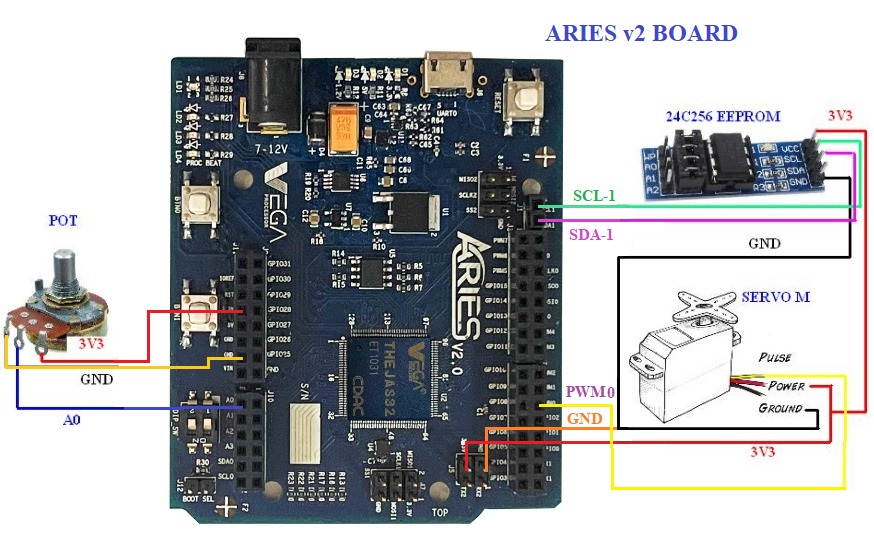
Our main components are 24C256 EEPROM, a servo motor, a potentiometer and ARIES v2 board.
EEPROM is used to store the pot values so that they can be read multiple times as required, for moving the servo motor accordingly, because our only aim is to repeat the same chain of actions done by the servo motor.
The potentiometer is used, to set the limit for the movement of the servo motor, So that we could easily manage to move our robot according to our will.
Circuit Diagram
The potentiometer and servo motor are interfaced to GPIO pins of ARIES board and EEPROM communicates with I2C protocol. Connect VCC and GND of EEPROM board to +3.3V and GND respectively of ARIES v2 board. Then connect SCL and SDA of EEPROM board to SDL-1 to SDA-1 of ARIES v2 board, Pulse pin of servo motor to PWM[0] of ARIES board , middle pin of potentiometer to A0 of ARIES v2 board and terminal pins of potentiometer to +3.3V and GND of ARIES v2 board.
Now, for powering up the ARIES v2 board via USB port of a Laptop/Desktop/PC and burning the code into the ARIES v2 board, we have to use a micro USB type B to USB type A cable. The cable should be connected to UART0 port of the ARIES v2 board, and the Laptop/Desktop/PC should be preinstalled with VEGA SDK and Toolchain.
| Industrial Robots | ARIES v2 Board |
| VCC | +3V3 |
| GND | GND |
| SCL (EEPROM) | SDL-1 |
| SDA (EEPROM) | SDA-1 |
| Pulse (Servo) | PWM[0] |
| Middle pin of POT | A0 |
Procedure
After setting up the toolchain and SDK path environments are ready, build the example program for Industrial Robots by:
cd vega-sdk/examples/i2c/industrial_robot_democlean command to clean the executable :
make cleanthen use make command to build it.
makeNow, we can transfer the built program to the board, before transfer please ensure that you have connected the board UART connector to the PC.
Open a new terminal and execute the following command.
sudo minicom ariesNow you can see the minicom terminal opened and the board UART terminal is ready.
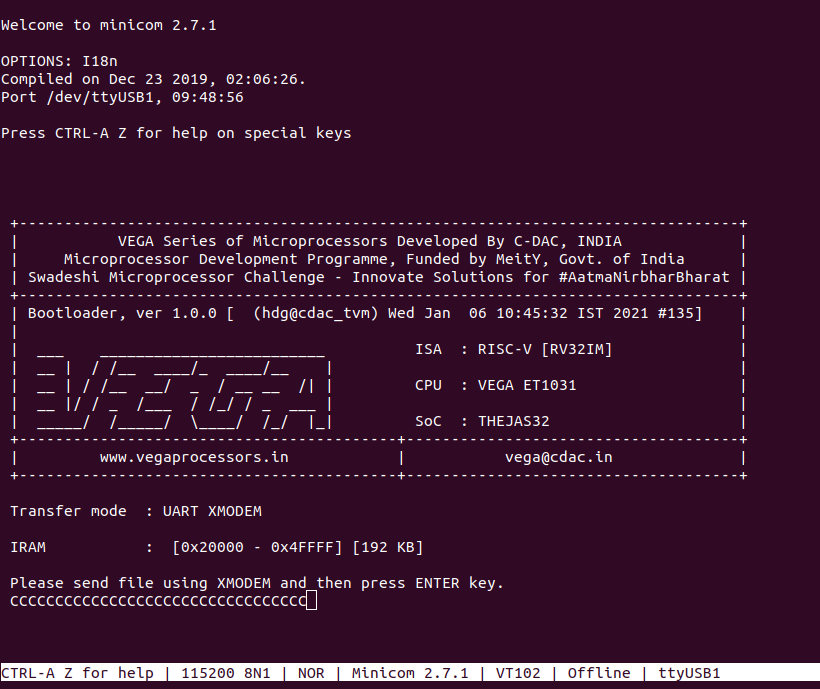
Use CTRL+A S to enter file sending menu and select xmodem by pressing Enter.
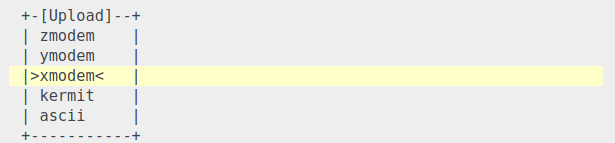
In the next window, with the space bar select the industrial_robot_demo.bin file to be transferred. By pressing Enter, the transfer process starts.
Wait until the process is completed. The screen should display how much data has been transferred.
After completing transfer the Program will start to execute.
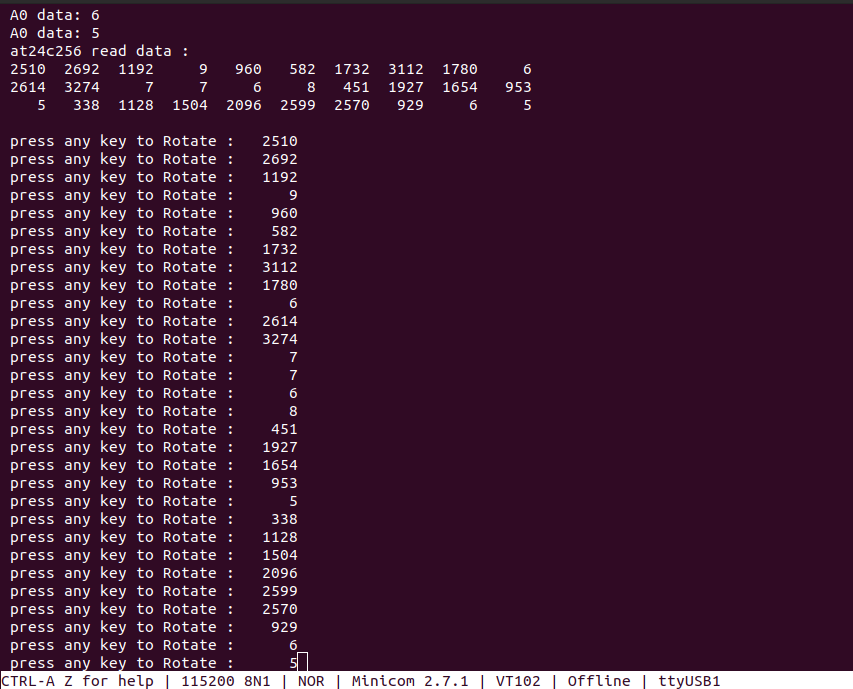
The output is displayed in minicom UART terminal:
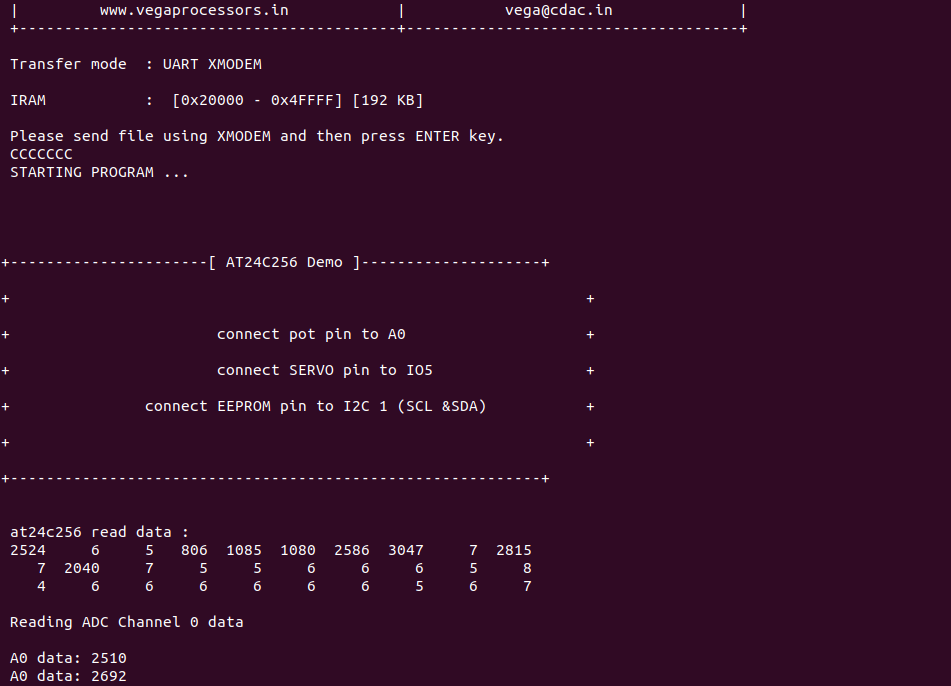
Now, we can record the new values by turning the POT each time and press the SPACE bar. The Servo motor will rotate according to the new values entered.

Next, press the SPACE bar to move the servo motor according to the saved data in EEPROM. We can see the actions are repeated by the motor while we press the key.
For additional informations:
https://ww1.microchip.com/downloads/en/DeviceDoc/doc0670.pdf